Basic Editing Functionality
Overview of the document viewer
Documents are viewed and edited in the document viewer:
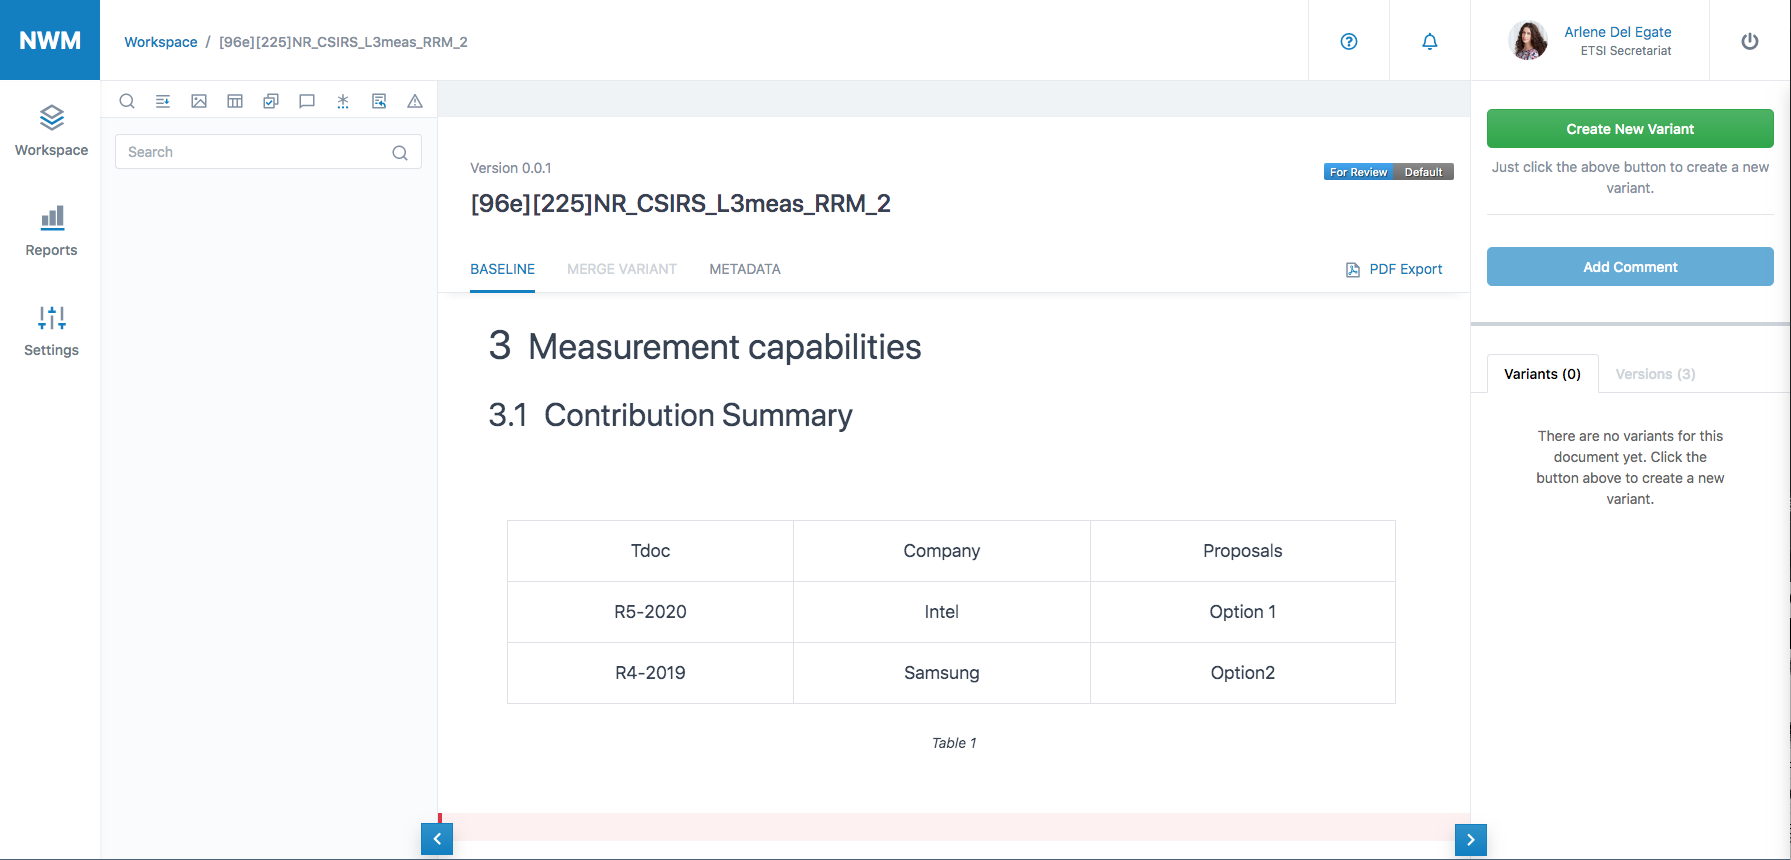
On the top of the screen, the breadcrumbs are used to navigate back to the workspace, or between a Variant and the parent document.
On the left, the document navigation menu and navigation column offer a number of functions related to navigating the document. See the Left-hand Navigation Column section for more information.
The right-hand column is used for general function buttons: Save, Share, Add Comment etc. The lower half of this column displays any available version or Variant of the document, together with any actions to perform on them, such as accepting or rejecting a variant, or merging it into the parent document. This column is also used to edit individual comments.
Tip
Remember to save your work regularly. The browser tab will show an indication of any unsaved changes in the document being edited.
Tip
Display multiple documents by opening each document in a new browser window or tab. When you log out of NWM from one tab, you log out from all tabs. However you are warned of unsaved changes in other open tabs.
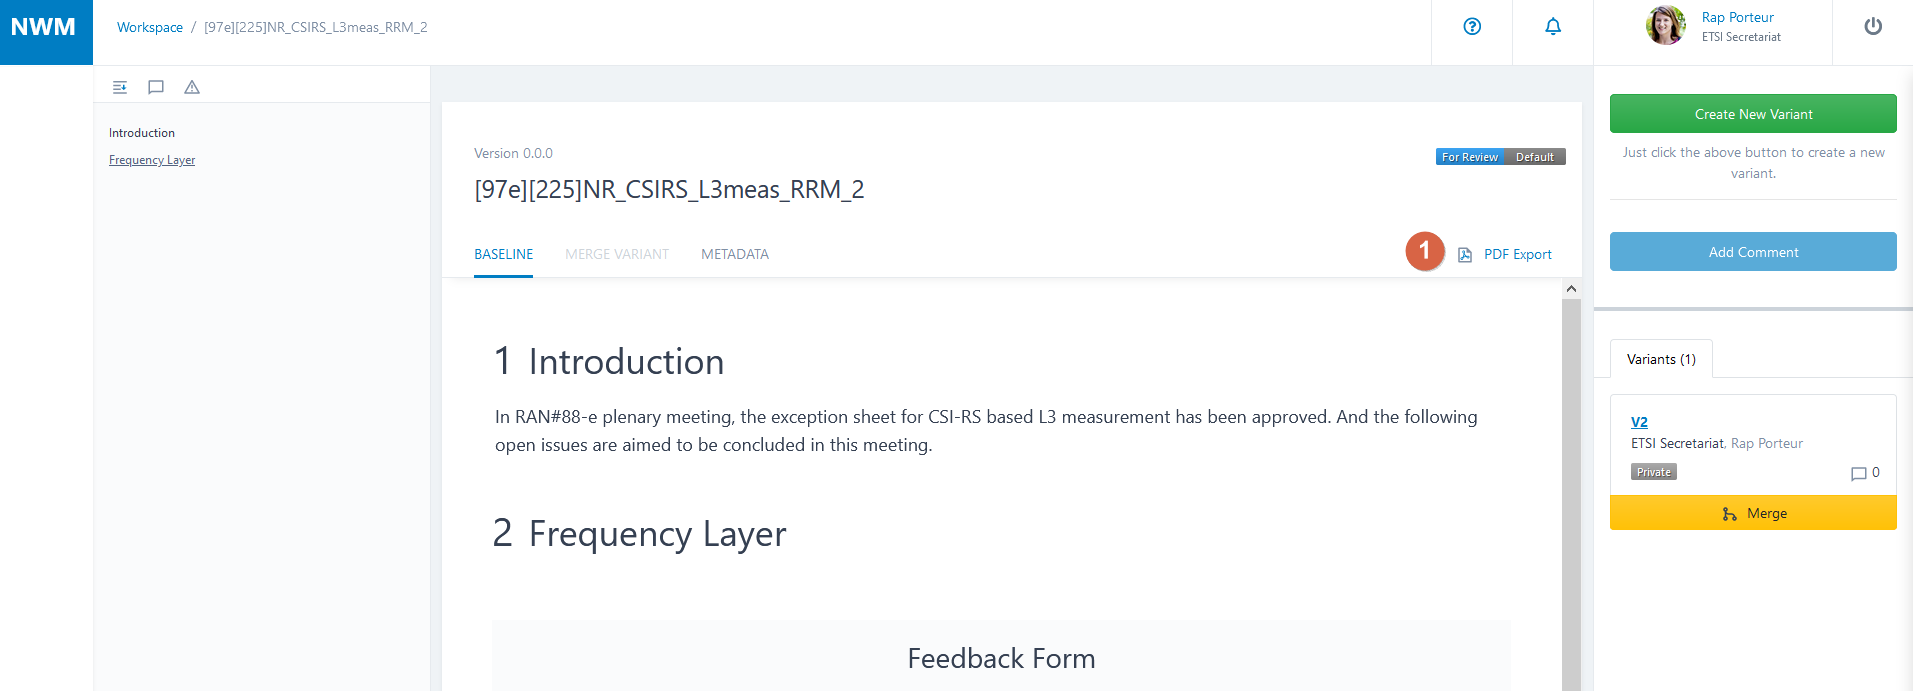
PDF Export
To export a document click on the Export PDF button (see  ). The PDF Export function formats the document automatically, depending on the type of document (e.g. ETSI or 3GPP specification or other document types).
Tip
Any user may at any time export the document to PDF, and then open the PDF file in a recent version of Word.
Attention
Importing PDF to Word is convenient, but doesn’t always give the best results.
Here are some alternatives:
Adobe PDF converter: either with full Acrobat installed if you have it, or online at https://www.adobe.com/acrobat/online/pdf-to-word.html (may require creating an Adobe account for free). Not the best conversion result.
https://pdf2docx.com/. Free online conversion tool (there are many, this one seems to produce better results than other tools but it has not been heavily tested. USE WITH CAUTION – we have no idea who is behind this tool. Do not use for anything confidential.
Upload the PDF to Google Drive. Open it in Google Docs. Download as a Word file from Google Docs (File/Download/Microsoft Word). This is a bit more cumbersome but probably safer than the previous solution. Gives good results.
For the best Word document result, consider combining output from each of these tools.
A better way of generating Word files is being studied.
Left-hand Navigation Column
The Navigation Column on the left of the document viewer window offer a number of ways to navigate the document. Mouse-over each icon on the top menu to find its function.
![]() Table of Contents
Table of Contents
View and browse the structure of the document. To insert and edit headings, see Headings below.
![]() Comments
Comments
View and navigate the list of comments in the document. A comment is also known as a Discussion Thread.
![]() Errors
Errors
This feature is activated for documents which must obey specific drafting rules. View and navigate the list of errors detected in the document. Paragraphs with errors are marked with a red background.
![]() Search
Search
Search for text in the document.
Toolbar
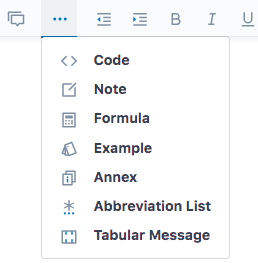
The editing toolbar becomes visible when a document is in editing mode.

Use this toolbar to change text to bold, underline or italics, to insert a heading, insert an ordered (numbered) or unordered (bulleted) list, insert a table or a figure. You can also indent or outdent to decrease or increase heading levels or increase or decrease list indentation.

Indicative Scrollbar
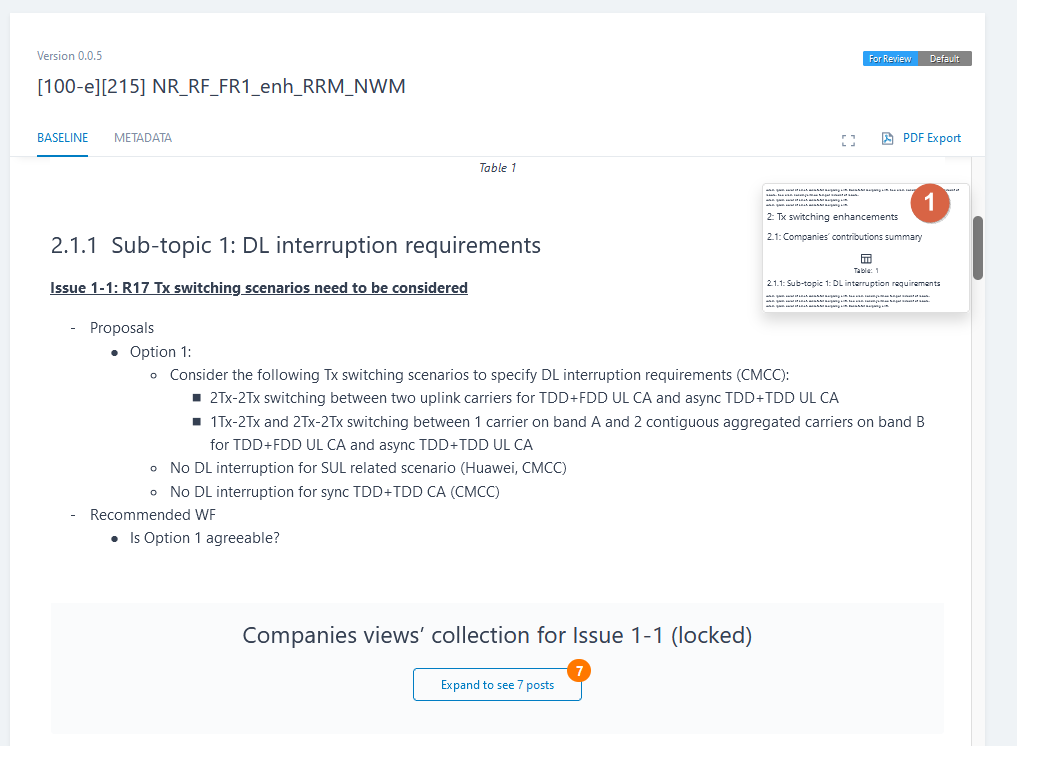
With the support of large documents comes an indicative scrollbar.
Navigation with the scrollbar
The scrollbar increases its width on hover, and the knob gets a darker color.
Now you can click on the knob, and the indicator box displays the current location (see
).As you drag the knob, the indicator box displays where you will ‘land’ when you release the click.
Document size
The size of the knob indicates the size of the document:
Small knob -> large document
Large knob -> small document
Attention
The scrollbar provides approximative information about the document’s location and size. This is because of the ‘large document algorithm’, which displays only portions of a document.
Paragraphs
A newly created document contains an empty paragraph. This is the starting point for you to edit the document (e.g. to insert a heading or to start typing text).
A paragraph can be inserted after a heading by putting the cursor at the end of the heading and pressing the Enter key.
A paragraph can also be inserted after a figure, table or feedback form. Place the cursor in the caption of any of the beforementioned objects and press the Enter key. A new paragraph will be created after the current object, and you can continue to edit.
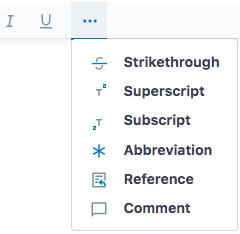
The following formatting is available:
Bold
Italic
Underline
Strikethrough
Superscript
Subscript
Tip
The shortcuts Ctrl+B (Bold), Ctrl+U (Underline) and Ctrl+I (Italic) are available.
Headings
To insert a heading, place the insertion point (cursor) anywhere in a paragraph or heading and click the Heading button on the editing toolbar.

The following insertion behaviour is available:
- Insert a heading via the toolbar
Cursor anywhere in a heading -> A new heading is inserted after the current heading
Cursor anywhere in a paragraph -> A new heading is inserted at the current cursor position (Inserting a heading in the middle of the text of a paragraph will cause the paragraph to split)
- Insert a heading via the Enter key
Cursor at the start of a heading -> A new heading is inserted before the current heading
Cursor in the middle of a heading -> The current Heading is split into two headings
Cursor at the end of a heading -> A new paragraph is inserted after the heading
The following deletion behaviour is available: - To delete a heading, use the Backspace or Delete key
Headings are automatically numbered.
Heading levels:
Typically, a newly inserted heading will have the same heading level as the heading of the current clause. However, inserting a heading in a clause which has a sub-clause will result in a heading level of the sub-clause.
To lower the heading level, use the Indent button on the toolbar. To increase the heading level, use the Outdent button.
Sub-headings are indented/outdented with their parent-headings
Tip
Shortcuts Tab/Shift+tab for indenting/outdenting Headings are available. The shortcuts work only when the cursor is placed at the start of the text.
Tip
In order to insert a heading after a Feedback Form, figure or table, place the cursor in the caption field and press Enter. A new paragraph will be created after the current object, and you may insert a heading in this paragraph.
Lists
Ordered (numbered) and unordered (symbol) lists can be inserted anywhere in a document.
Unordered Lists
To insert an unordered list, use the Unordered List toolbar button:

Alternatively, starting a new paragraph with the dash or minus (-) character will convert the paragraph to an unordered list.
Ordered Lists
To insert an ordered list, use the Ordered List toolbar button:

Alternatively, starting a new paragraph with the plus (+) character will convert the paragraph to an ordered list.
Convert an ordered list to an unordered list, or the opposite, using these two buttons.
List Indentation
Increase the indentation of a list item using the Indent toolbar button:

Decrease the indentation of a list item using the Outdent toolbar button.

Increasing or decreasing the indentation level of a list item will also increase or decrease the indentation level of child items (i.e. items of a lower indentation level).
Tip
Shortcuts Tab/Shift+tab for indenting/outdenting List items are available.
The formatting and numbering of lists is as follows, and is fixed:
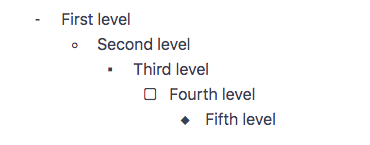
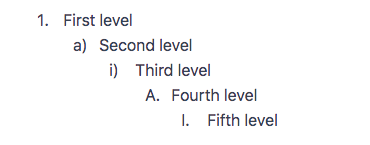
Unordered and Ordered Lists
More on Lists
To insert a second line in a list item, press Enter at the end of a list item. This will insert a new list item of the same level immediately below. Then delete the number/icon of the new list item.
Pressing Enter with the cursor in the middle of a list item will split that item and create a new list item at the same level with the remaining text.
Pressing Enter with the cursor at the start of a list item will insert a new item at the same level immediately above the current item.
To turn a list item to normal text, outdent it until it becomes aligned with other normal text paragraphs.
To split or to leave a list, press Enter twice.
To join two list items, put the cursor at the end of the first list item and press twice DELETE. Alternatively, put the cursor at the start of the second list item and press twice BACKSPACE.
To insert a list item inside a table cell, use the shortcuts - or +.
Attention
Multiple List items cannot be selected and indented.
Inserting a Heading, Figure, Table or Feedback Form within a List creates an error.
You cannot insert a List when the cursor is in a Heading. The cursor needs to be in a paragraph.
Figures
To insert a figure after the current paragraph, use the Figure toolbar button:

A figure placeholder is inserted. Use this to drag/drop or browse for an image file to insert as the figure. Most typical image file types are supported.
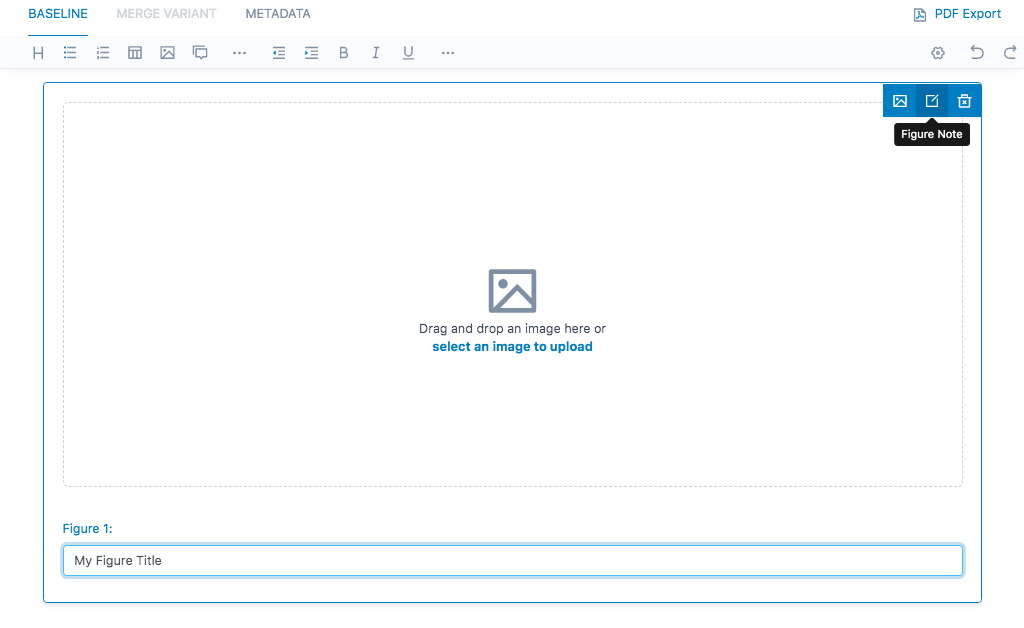
The figure title can be directly edited at the bottom of the figure placeholder.
Figure editing buttons and fuctions become available when a document is in edit mode (e.g. when editing a new document or a new Variant). Click inside the figure placeholder to make the buttons appear:
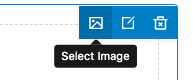
To change a figure, use the Select Image button in the top right-hand corner of the figure placeholder and select a new image file to insert, replacing the previous one.
To delete a figure, use the Delete Figure button in the top right-hand corner of the figure placeholder. This deletes the entire Figure placeholder, any image it contained, the figure note and title.
A figure note can also be inserted using the Figure Note button at the top right-hand corner of the figure placeholder.
Note
Modifying the image layout, border, size and position is not yet possible.
Note
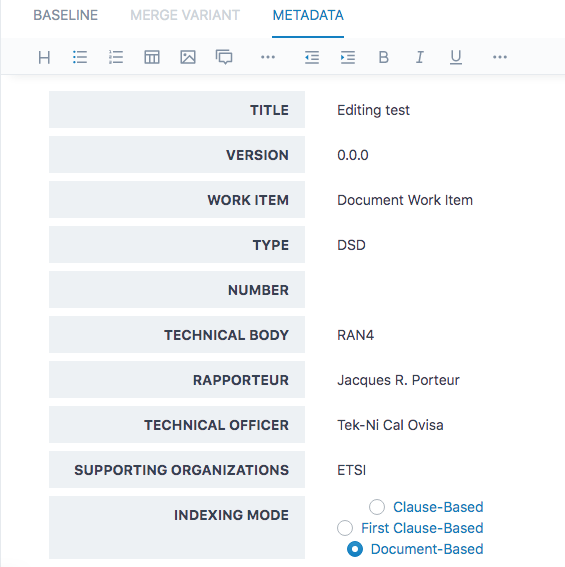
Figure numbering can be set to be continuous throughout a document, based on the current clause number, or based on the top-level clause number. In future this will be configurable by a document owner or the Technical Officer. At present it is not user-configurable. The selected numbering scheme can be seen as part of the document meta data.
Tables
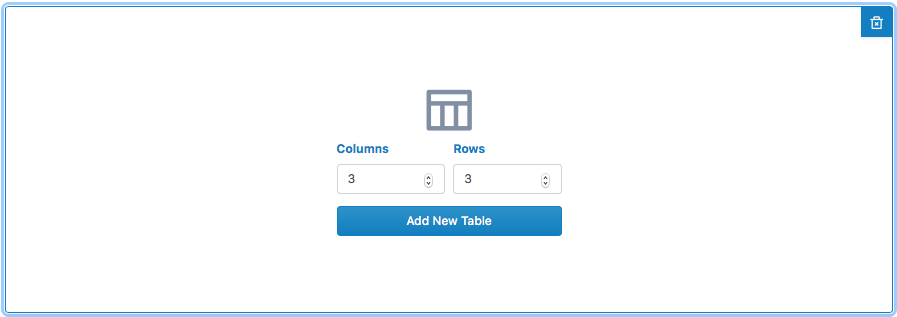
To insert a table after the current paragraph, use the Table toolbar button:

Next, choose the number of rows and columns required. Rows or columns can also be added or deleted later.
When in editing mode, a table is enclosed in a blue border. To edit a table (in a document which is in edit mode), click inside the table to make the blue border appear.
A Delete Table button also appears on the top right when in table editing mode.
Edit the cell contents directly. Use Tab or Shift-Tab to move from cell to cell. Multiple paragraphs can be placed in a cell, and text formatting can also be used. At present, a figure cannot be placed in a table cell.
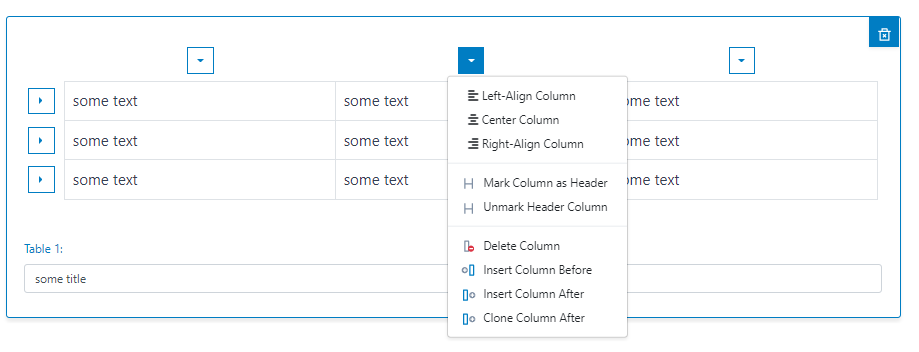
Operations can be performed on rows, columns or selected cells: when in table edit mode, use the arrow buttons above each column or to the left of each row (see example below) to view the available choices.
In order to apply an alignment only to one cell, you need to select the cell, and then apply the alignment action via the arrow button.
The table title can be edited directly, in the field below the table.
While table size, layout and formatting controls are not yet available and will depend on the stylesheet of the document type being edited, rows or columns can be marked as headers, with the following effect:

Attention
Selecting and merging cells will delete the contents of all the cells being merged. Merge cells before adding contents to them.
Notes
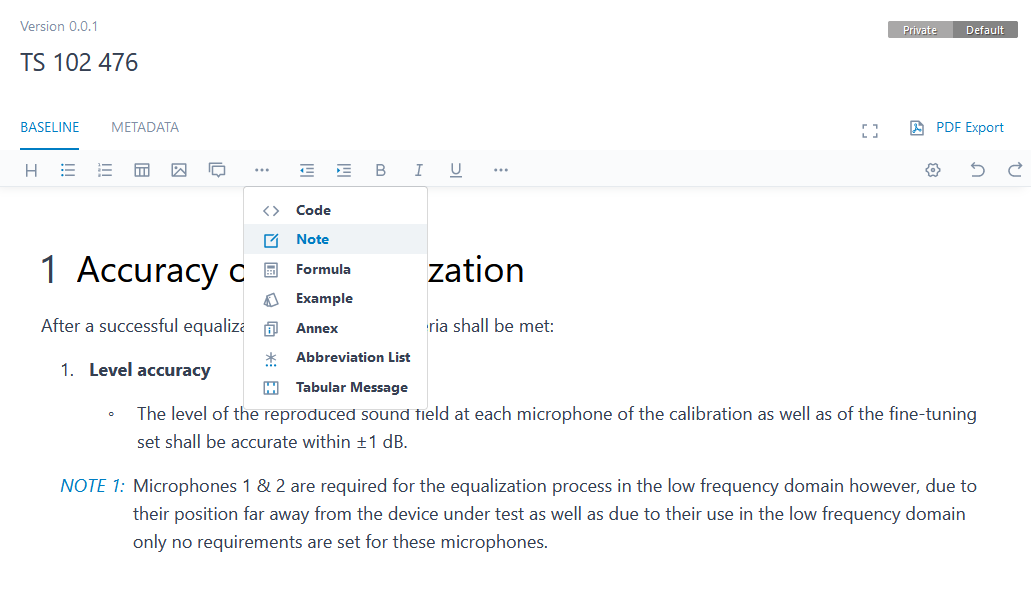
To insert a note, use the Note toolbar button:
Notes are auto-numbered with local scope.
Each clause resets the note counter.
Copy & Paste inside NWM
You can copy or cut NWM elements such as table, figure, feedback form, formula etc. and paste it at another location of your NWM document.
mouse-over the element -> the element gets a blue frame
click on the element -> the element opens
use the keyboard short cuts ctrl+c or ctrl+x -> the element is in the copy buffer
paste with the keyboard shortcut ctrl+v in any location
Attention
To select a table, click in the whitespace between the blue frame and the table cells. Do not click inside a table cell.
Pasting Large Content into NWM
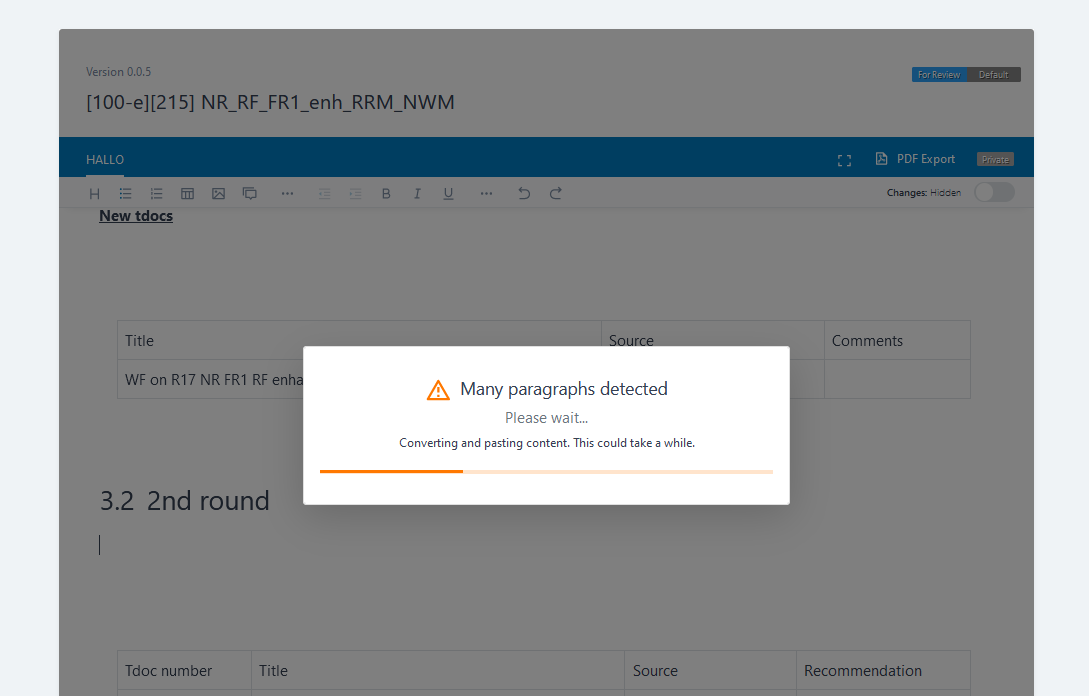
Pasting data from external sources requires converting the data to the NWM format, which is computation-intensive.
A notification banner is displayed while converting:

Another notification banner is displayed while converting large data:
Attention
The conversion process does not paste images; it only creates empty figure elements, which you need to fill with the images. See the chapter below Pasting Images to understand how to do this.
Pasting Images
You can copy&paste images from an external document (such as WORD etc.) into your NWM document:
Select the required image in the external source.
Copy the image.
- Either paste the image
anywhere in the text of your NWM document, or
into a figure element. Click on the figure element in which you want to add the image and paste the image.
Attention
Only the formats png and jpg are supported. WORD Drawing Canvas/Shapes etc. are not supported.
Drag & Drop Images into NWM
You can drag an image file from your file explorer and drop it into your NWM document.
- Either drop the image
anywhere in the text of your NWM document, or
into a figure element.
Attention
Only the formats png and jpg are supported. WORD Drawing Canvas/Shapes etc. are not supported.
Full Screen Mode
You can click on the full screen icon (see ), to obtain a display which covers the full screen.
Wide viewing window
Make the viewing window wider using the two blue arrows at the bottom of the screen.
When the sidebar is collapsed, in order to expand the sidebar again (making the viewing window smaller), you can click on the blue arrow, but you can also simply click into the sidebar itself.
Tip
The shortcuts CTRL + ALT + -> / <- can be used to open/close the side panes.
In-document Search
Overview
Click on the search icon to search for text in a document.
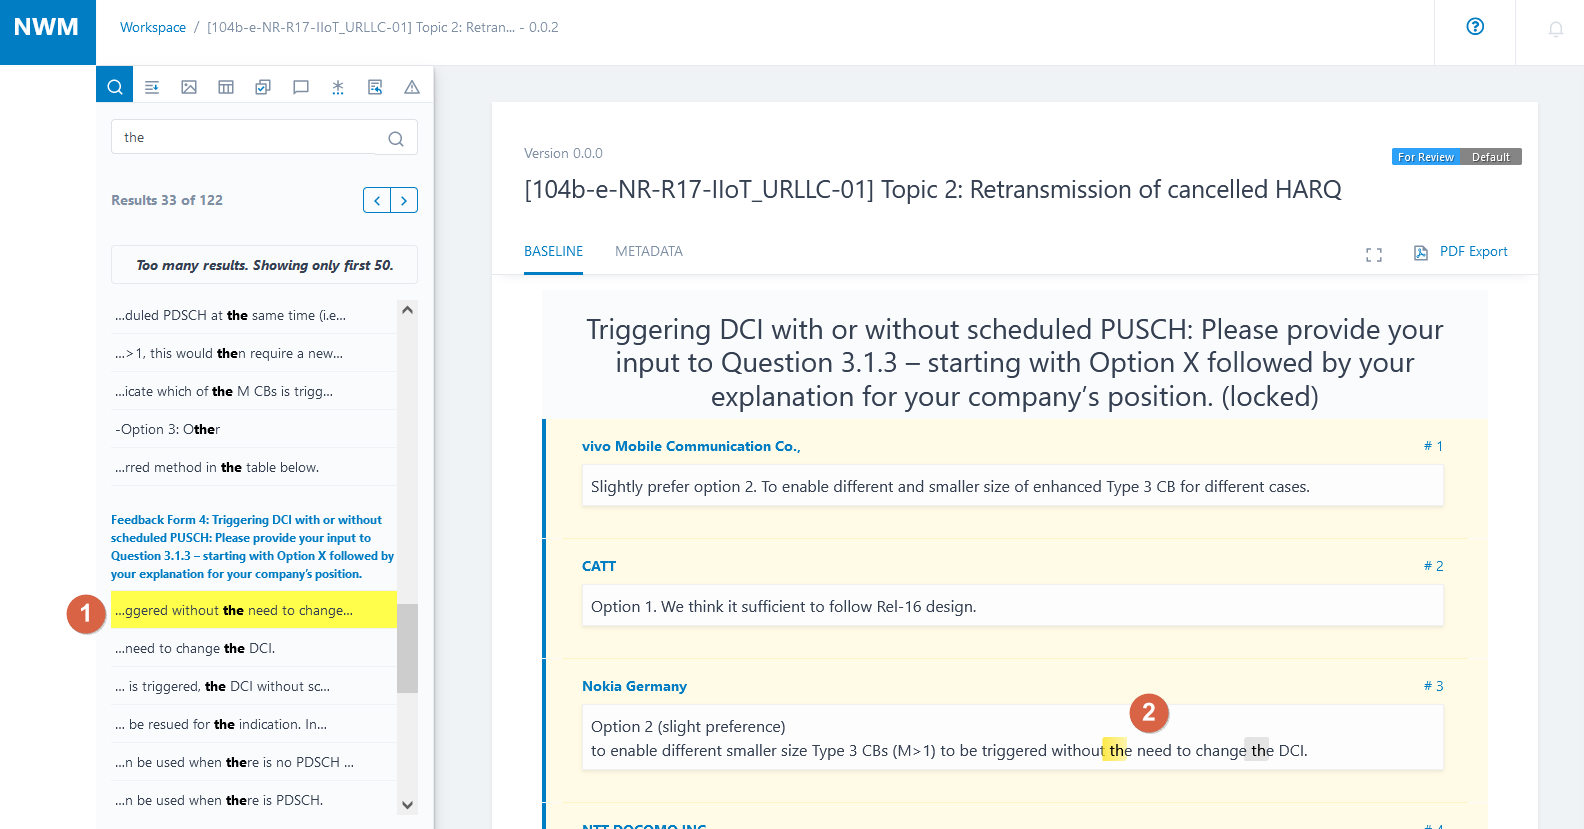
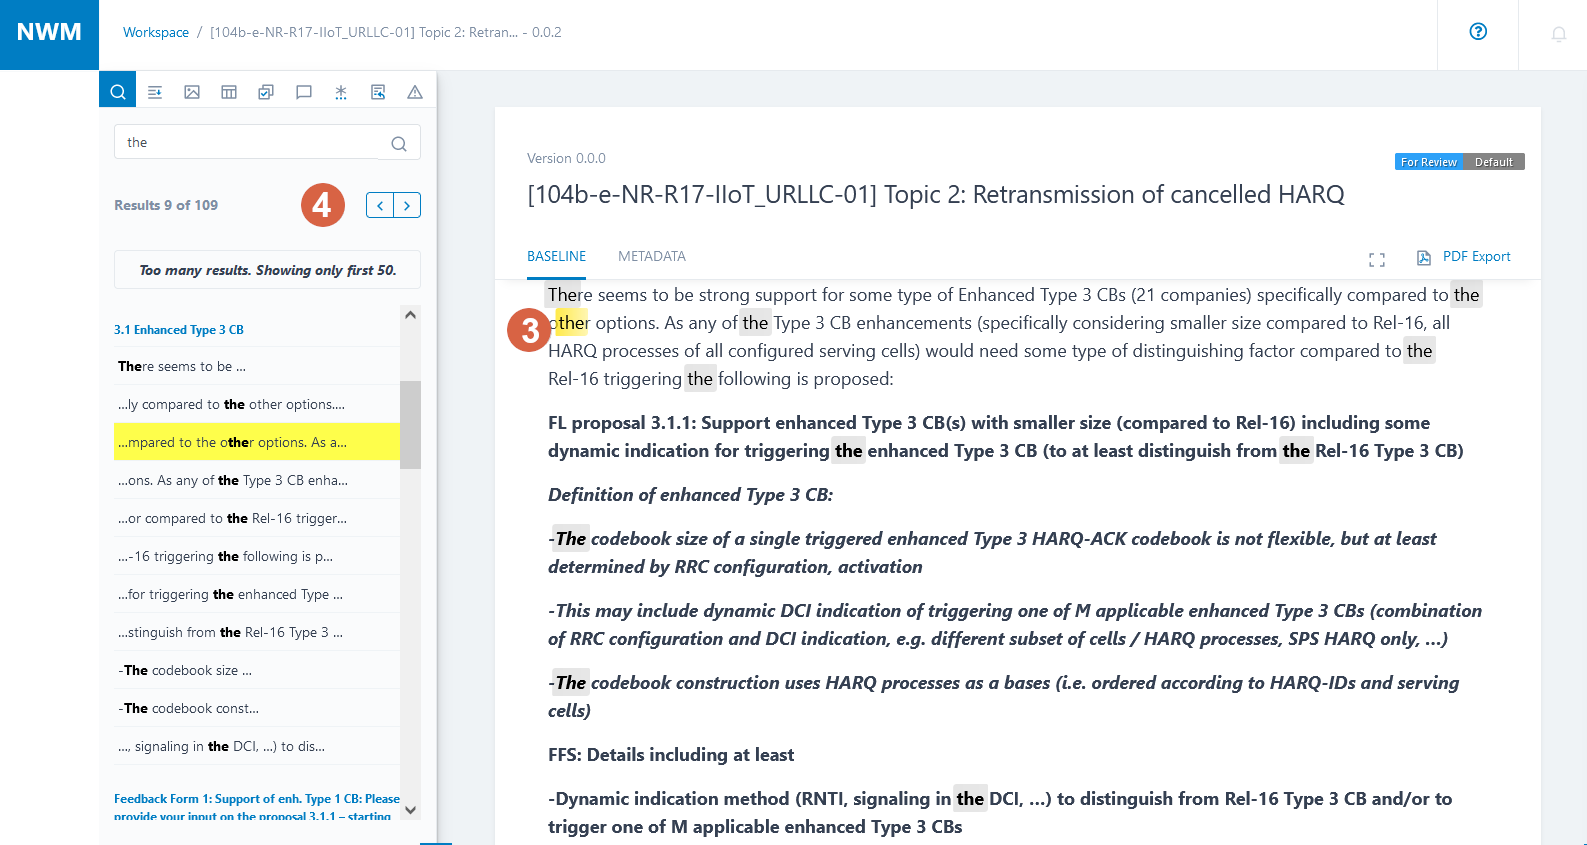
All search results are listed in the left pane and are highlighted in grey inside the document (see ).
Search results are grouped by document clause (see  ).
).
Search is case-insensitive and all formatting is ignored when searching.
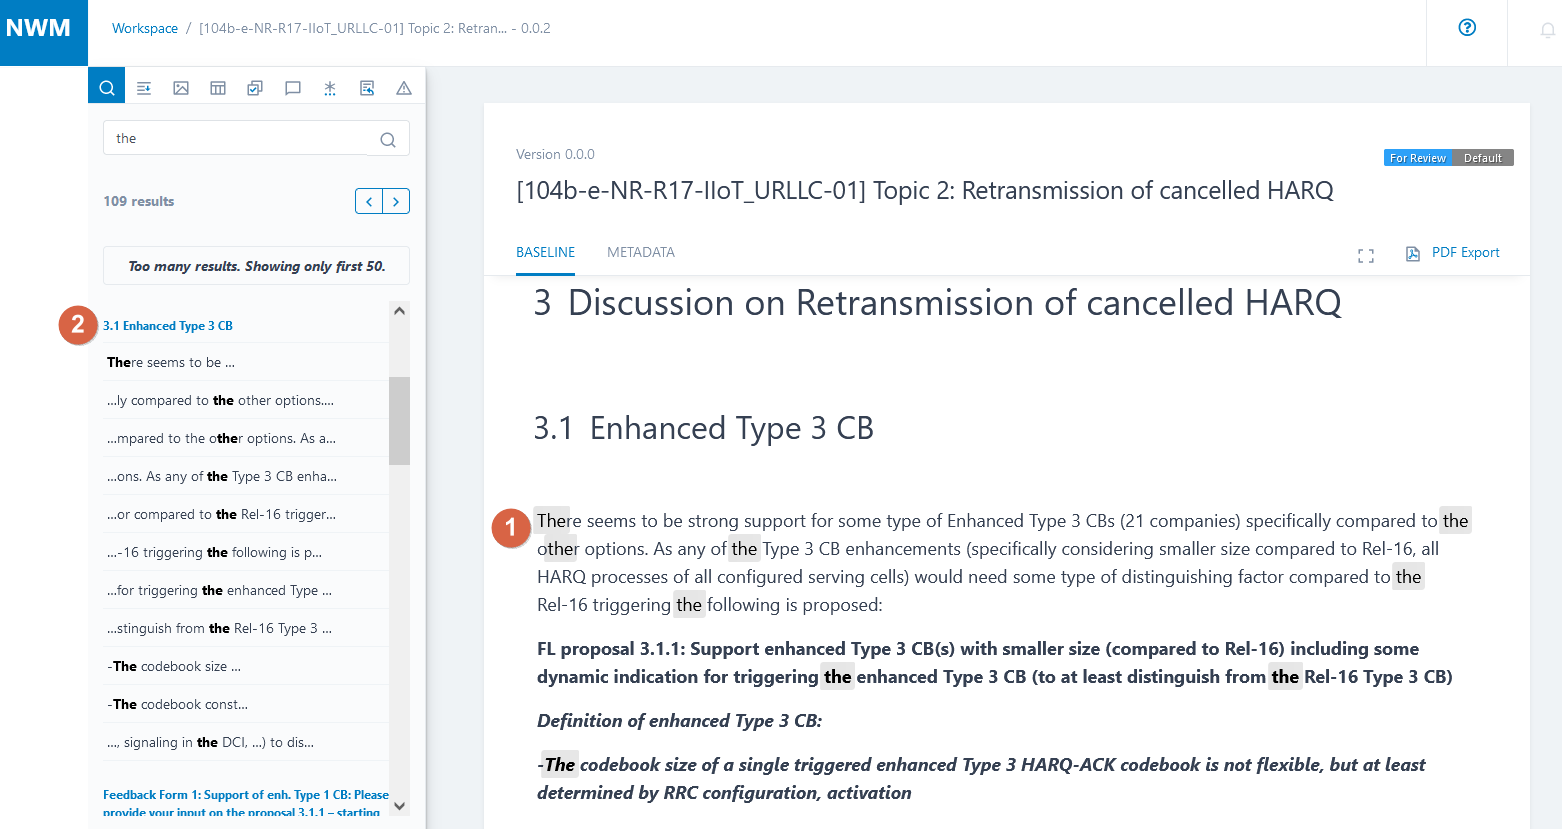
When a search result is selected in the left pane, the editor opens the corresponding location in the document and highlights the result in yellow (see  ).
).
Alternatively, use the Previous and Next element buttons for navigation (see  ).
).
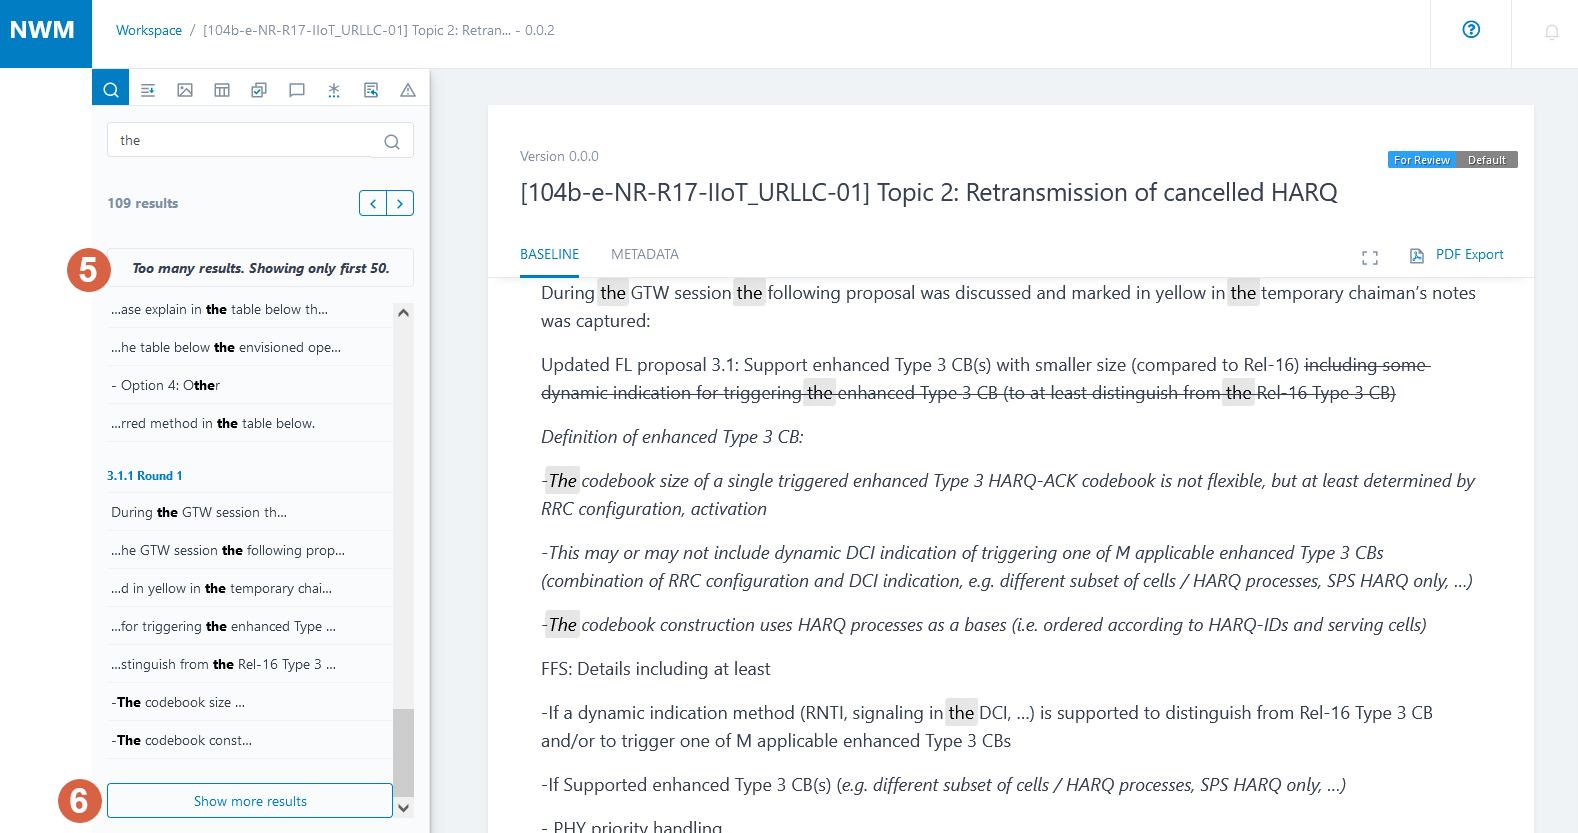
If there are more matching items than can be shown in the left pane (see  ), then a ‘Load more’ button is displayed (see
  ).
).
Tip
The shortcut CTRL+F can be used to enter the search mode.
Attention
Pressing CTRL+F twice opens the browser search.
How to search in a table?
The search covers table titles.
In order to see search results inside the table, follow these steps:
Scroll at least once to the table
The search results from inside the table will be added automatically to the left hand pane
Search inside the table will continue to work even when you scroll to another location
Note
Scrolling to an object in order to search inside it, is common practice for web browsers. However, in a future release it won’t be necessary to scroll to a table in order to see the search results.
How to search in a figure?
The search covers figure titles.
Text search inside figures or images is not supported.
How to search in a Feedback Form?
The search covers the titles of Feedback Forms.
In order to search inside a Feedback Form, first expand the feedback form at least once:
Expand the feedback form
The search results from inside the feedback form will be added automatically to the left hand pane (see
)When selected, the matching item inside the feedback form is highlighted in yellow (see
)Search inside the feedback form will continue to work even when you scroll to another location
Note
In a future release it won’t be necessary to expand the feedback form in order to see the inside search results.