Advanced Editing Features
Show Changes/Diff
The Show Changes/Diff feature allows you to highlight the changes between a variant and its baseline.
For the moment the only changes are shown that concern text modifications. Modifications to Headings, Tables, Figures etc. are NOT shown. These will be enabled progressively.
As an example please see the baseline called ‘show changes’:
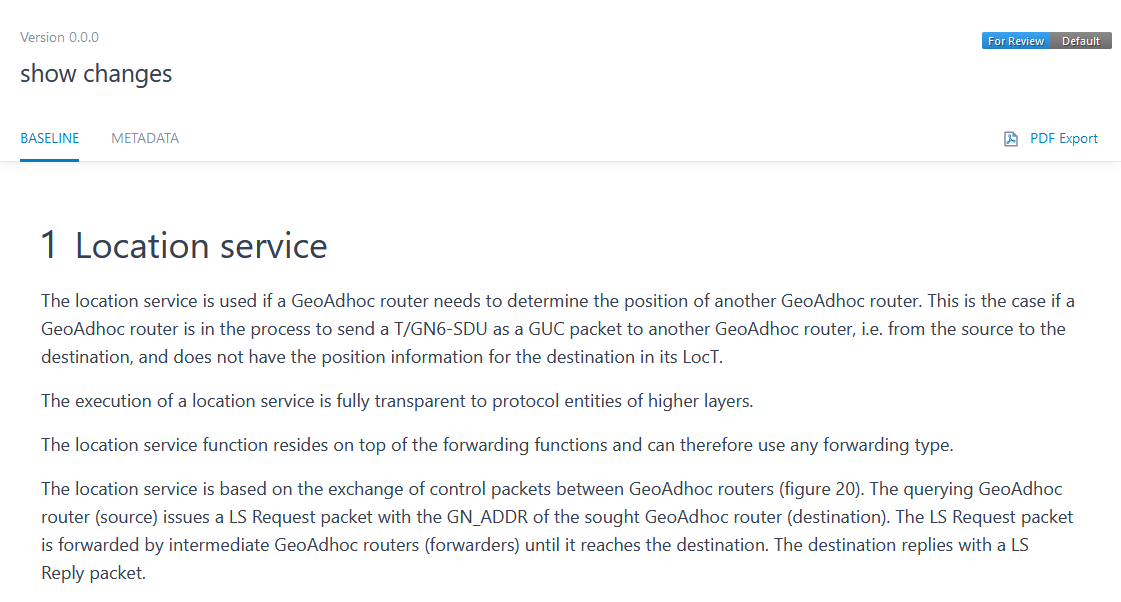
The variant ‘New Contribution’ has applied changes to the baseline.
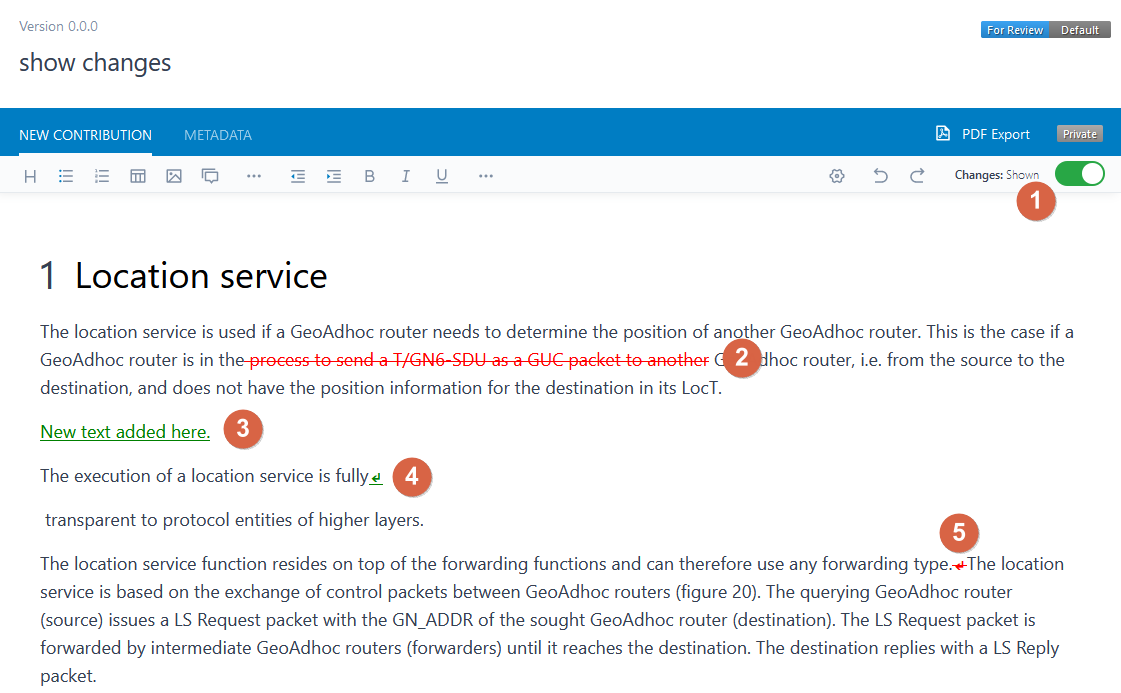
With Show Changes activated (see  ), the following changes are highlighted:
deleting text (see
 )
)adding of text (see
 )
)splitting a paragraph (see
 )
)joining two paragraphs (see
 )
)new or modified text in existing table cells
content in new table rows or columns
Tip
When you keep the Show Changes button switched on, then you can see your changes as you type.
Attention
Please toggle the Show Changes button to bring into line styled text such as BOLD, ITALIC etc.
Please note that this feature impacts only how things are displayed. There is no impact on saving your data or any other operation. If something goes wrong with this feature, then simply turn it off.
Version History
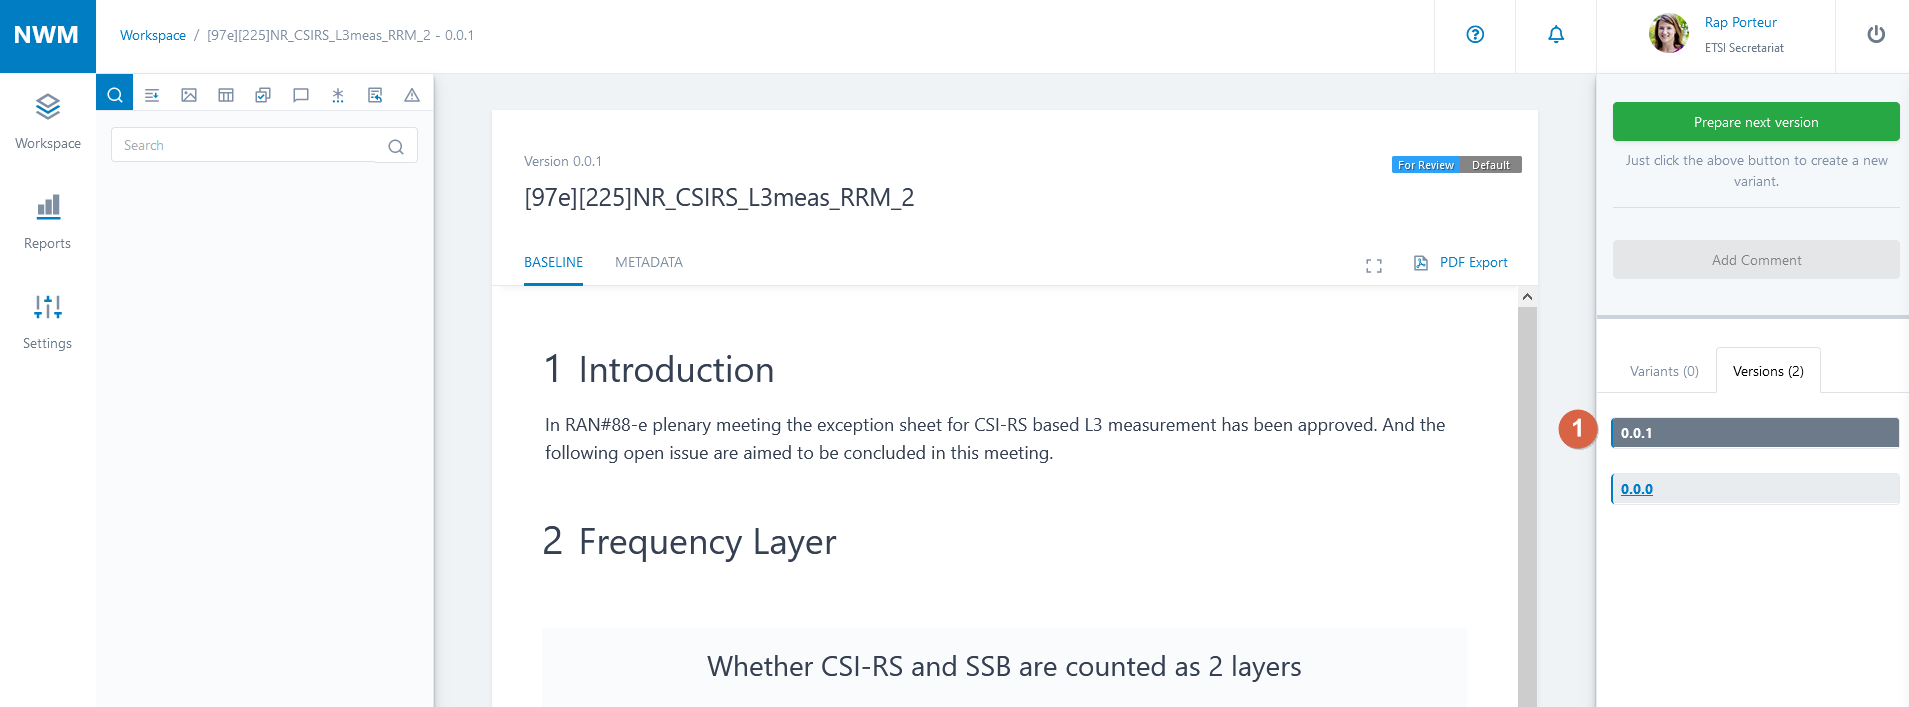
You can see the various baseline versions in the Versions tab in the right hand pane (see )
the baseline versions are indicate in grey bars, and are named starting from v0.0.0 onwards
the baselines can be clicked and will open
Tip
Please consult also the Document History
Feedback Forms
A Feedback Form is a form inserted in the body of a document to allow users to post feedback, opinions, comments. Feedback is provided on behalf of an organisation, not a person. Feedback can be provided at any time, without proposing a change to a document (creating a variant). More than one feedback form can be inserted in a document and each can be closed to new comments, or left open.
Attention
Do not confuse Feedback Forms, and posting feedback in this form, with Discussion Threads and commenting on selected text in a document.
Feedback Forms are part of a document and are more like a table.
Feedback Forms can only be inserted or deleted when a document is in editing mode (new document or drafting a variant).
Feedback Forms, and their content, are carried over from one version of a document to another (unless deleted).
Insert a Feedback Form
A feedback form can be inserted when a document is in editing mode (new document or new variant).
Insert a Feedback Form by clicking in the toolbar on the Feedback Form icon (see below).
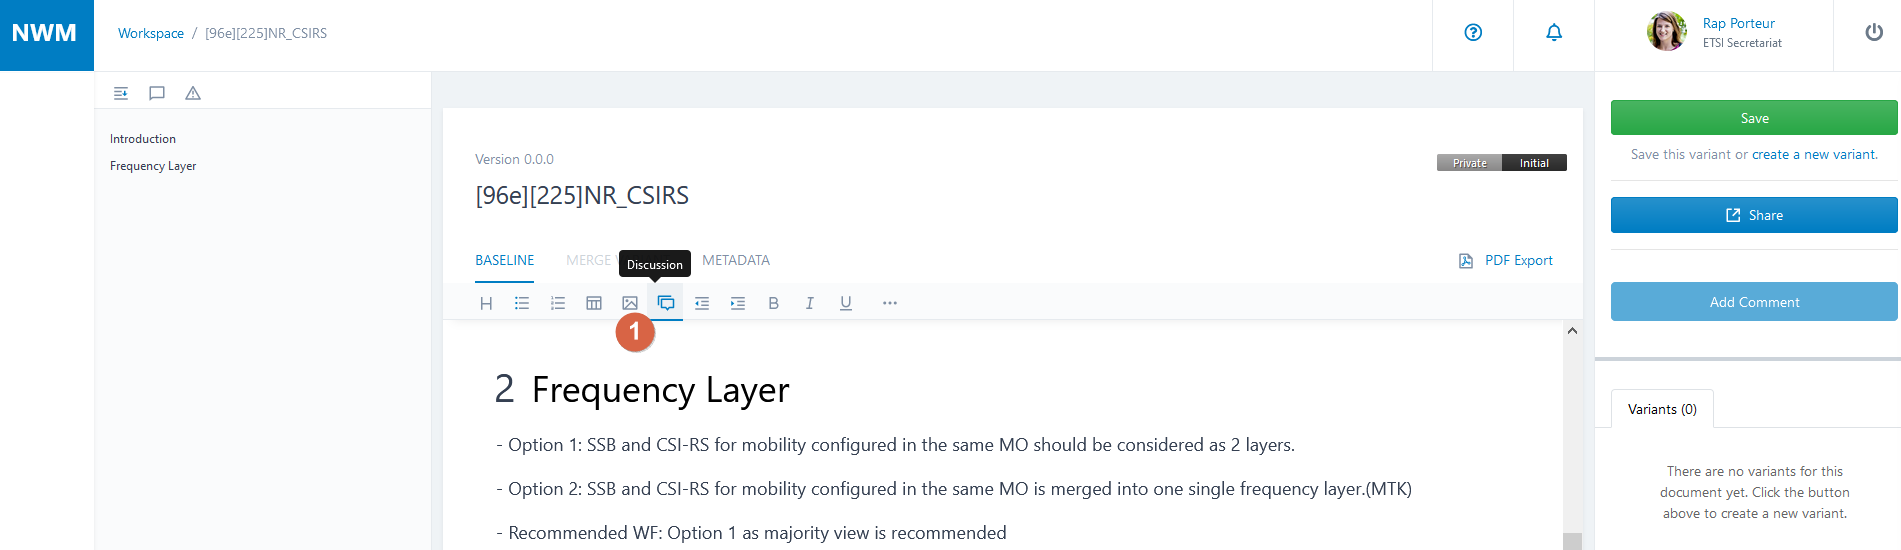
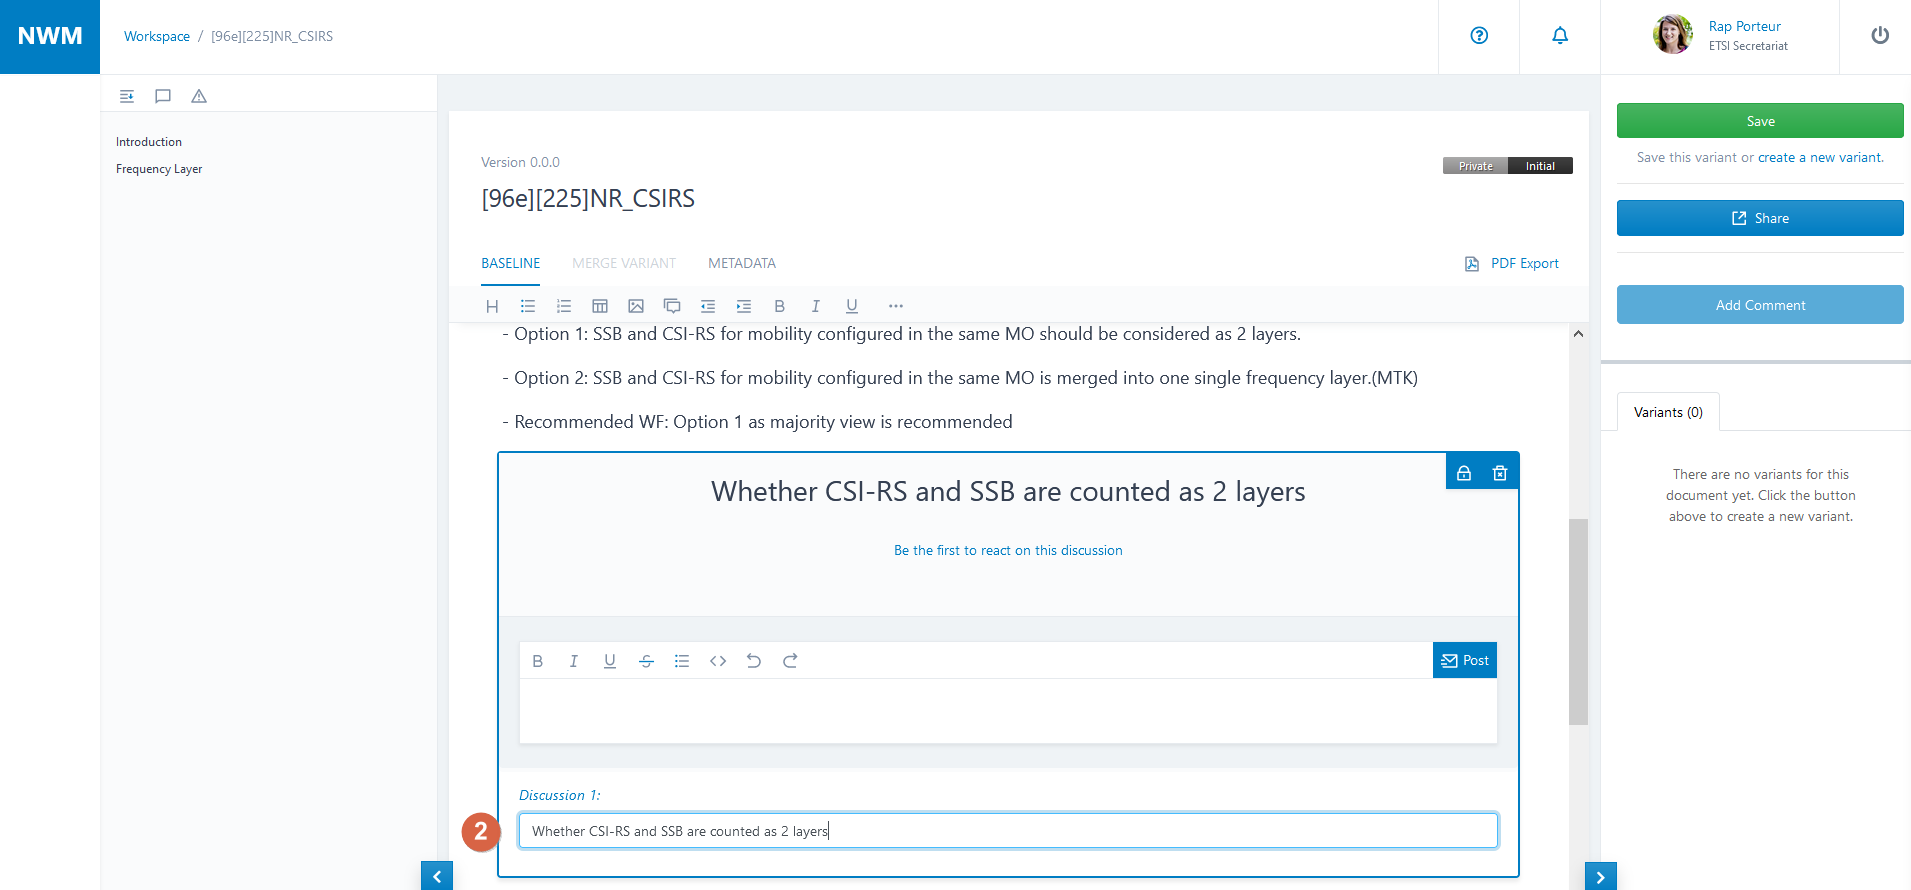
Provide the topic name in the caption of the Feedback Form (see below).
Edit a Feedback Form
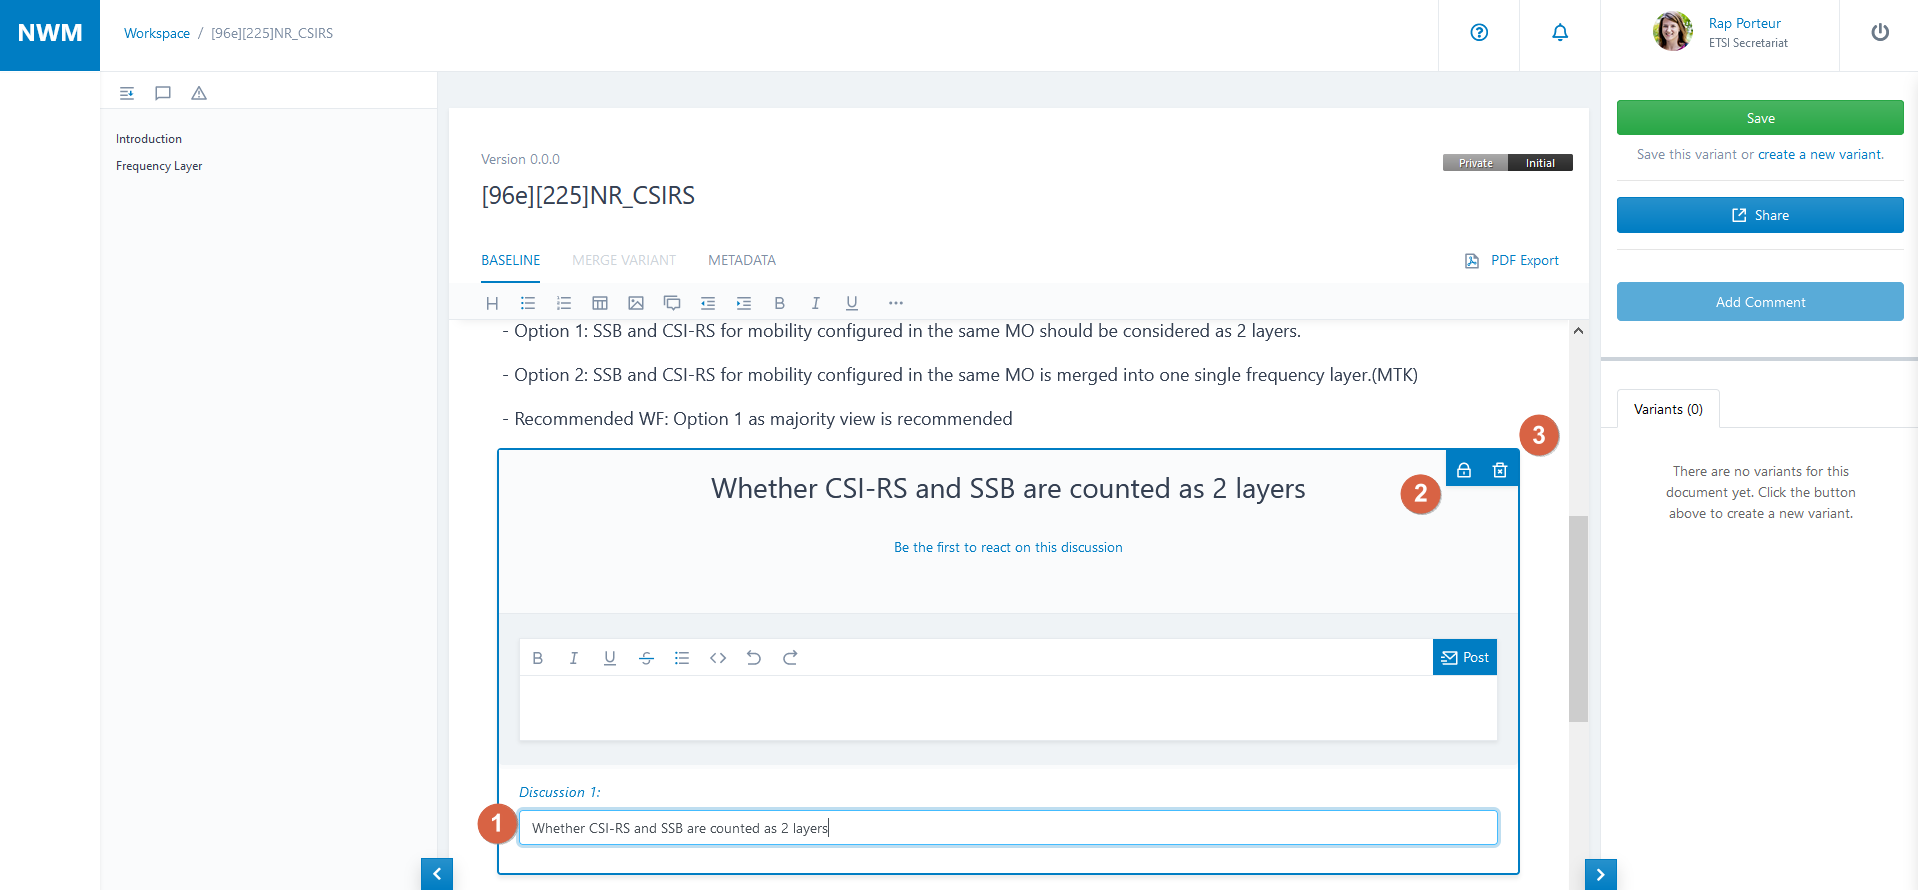
When you mouse-over the Feedback Form, a blue frame appears, indicating that you may click on it.
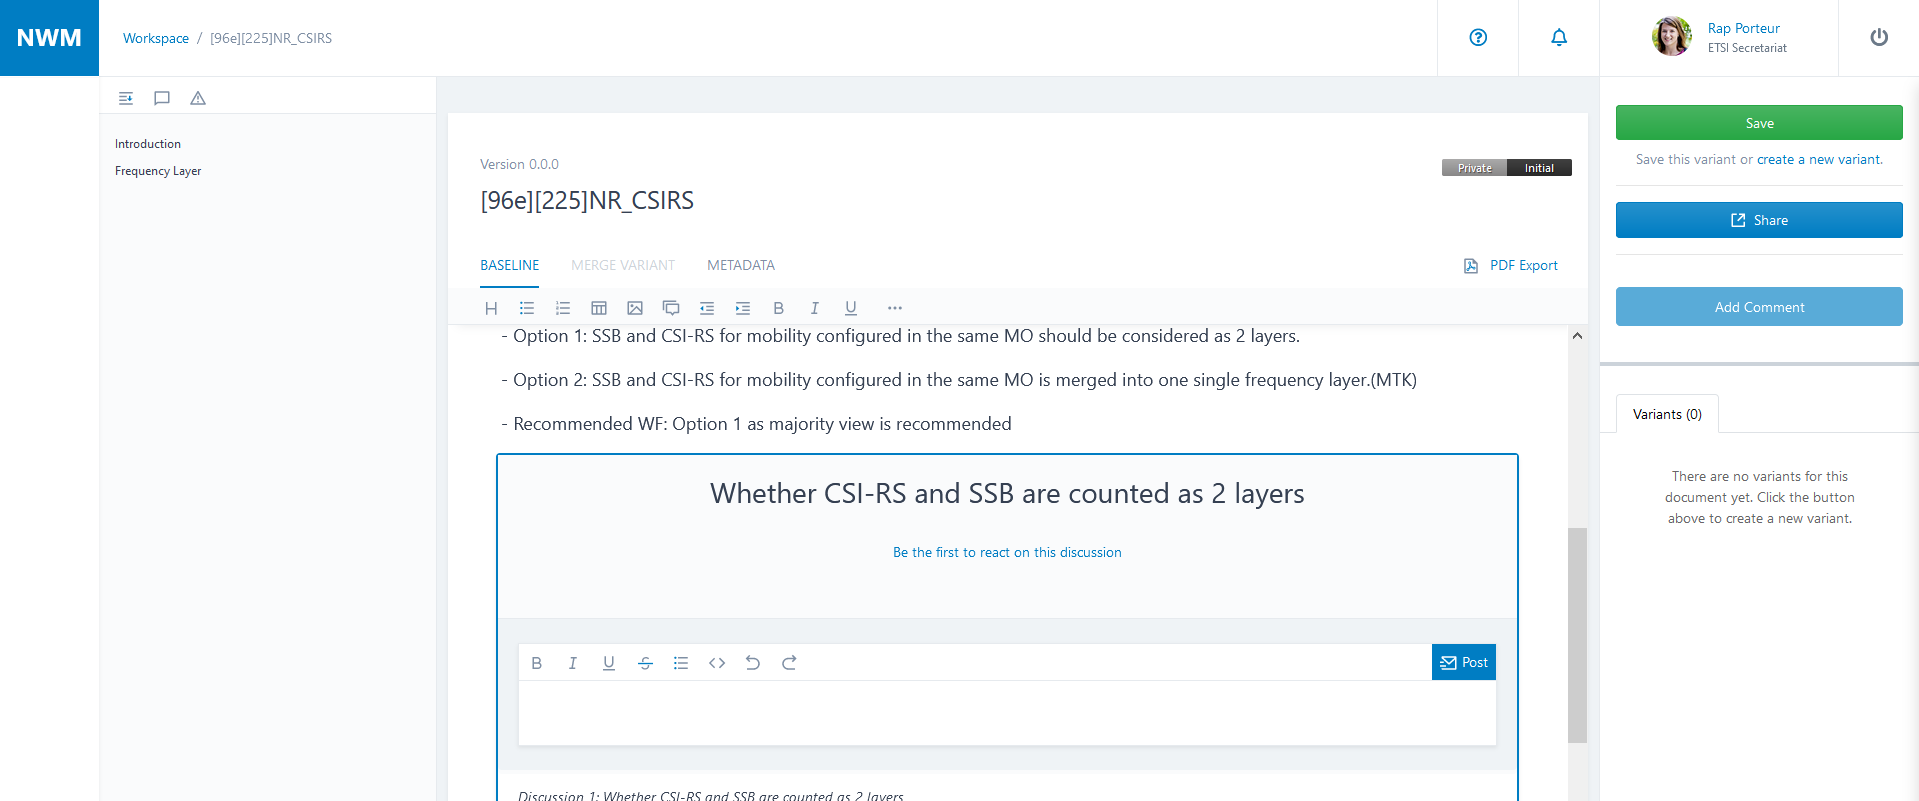
When you click on the Feedback Form, it becomes editable and you can:
modify the caption (see
below)lock/unlock the Feedback Form by clicking on the icon:
 (see below)
delete the Feedback Form by clicking on the icon:
 (see below)
Attention
Deleting a Feedback Form in a version of a document will still leave the form, and any feedback provided, visible in a previous version of the document.
Lock/Unlock a Feedback Form
Once a document is shared the owner may choose to lock a Feedback Form in order to close it for further feedback.
Please refer to the Edit a Feedback Form section to see how to lock/unlock a Feedback Form.
Tip
A document may contain multiple Feedback Forms, and the owner needs to close each individually.
Tip
A locked Feedback Form can be unlocked at any time by the owner.
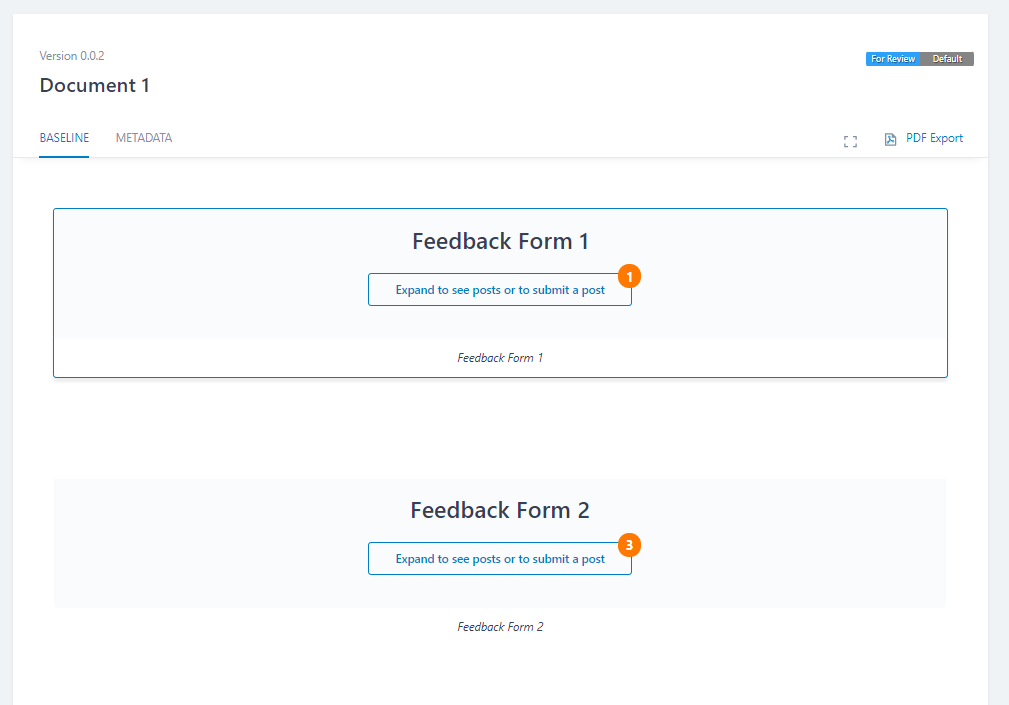
Collapse/Expand a Feedback Form
When a document is opened, all Feedback Forms are collapsed by default. This significantly reduces the time to open the document when it contains a large number of forms each with many posts.
To expand a Feedback Form, click on the large button underneath the form title. The text of this button varies, depending on whether there are any posts or new posts in the Feedback Form.
To collapse a Feedback Form, use the dedicated button in the mini-menu on the top right of the form:  .
.
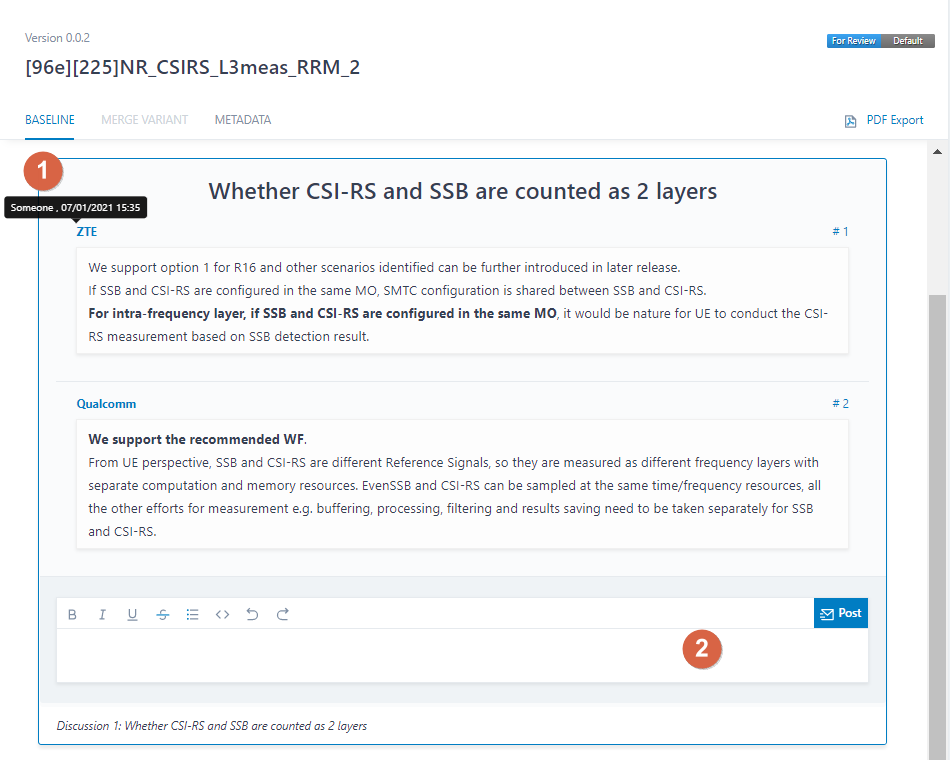
Provide Feedback
When viewing a document containing a Feedback Form, click on the form to open it. It may need to be expanded beforehand (see above). Existing contents cannot be modified, only new posts can be made.
Consult existing feedback, if any: mouse-over the company name to view the name of the author and the time of submission (see below).
Enter your feedback in the textbox and press Post (see below).
Tip
Instead of pressing the Post button, you can use the shortcut Ctrl+Enter to post your comment.
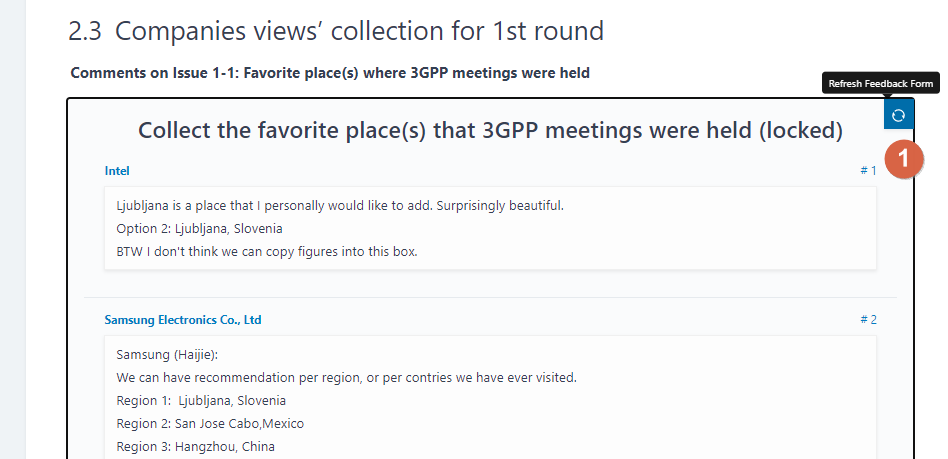
Refresh a Feedback Form
Feedback Forms are dynamically refreshed every 2 minutes. The manual refresh button allows you to fetch the latest comments faster.
A refresh button is available on the top right of the form to refresh a specific form (see
below)
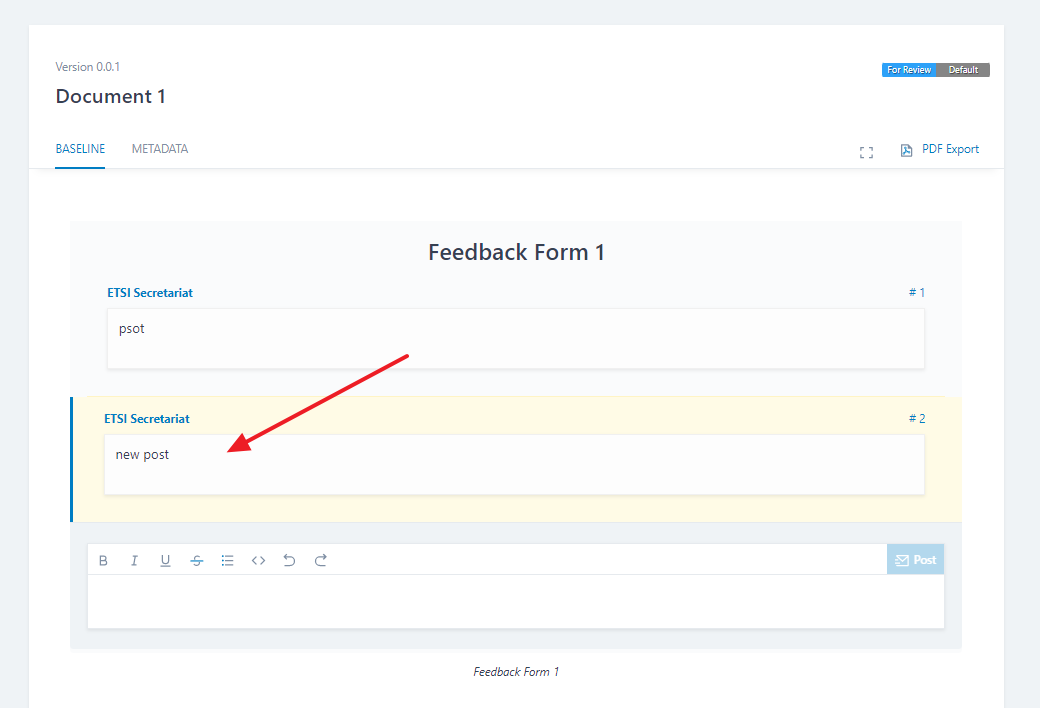
Highlighting of New Posts
Inside the document, the number of new posts is displayed on each Feedback Form header when the Feedback Form is collapsed. This number indicates the number of new posts since the Feedback Form was last expanded.
New posts in a Feedback Form are highlighted in yellow when the form is expanded. Upon collapsing the feedback form, the highlighting and the notification counter are removed.
Tip
When a document is already open, new posts are automatically retrieved.
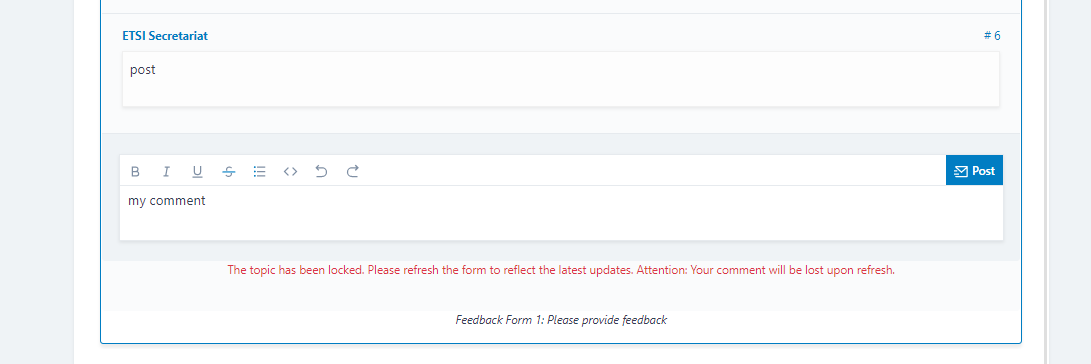
Post in a locked Feedback Form
When you click on the Post button, and the feedback form is locked, then the system warns you.
Formula
A formula can be inserted after the current paragraph. It is planned to also enable inline formula insertion.
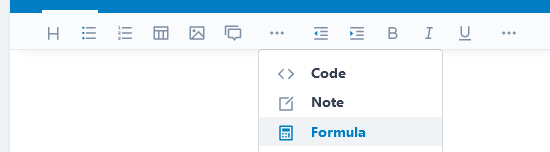
To insert a formula , use the Formula toolbar button:
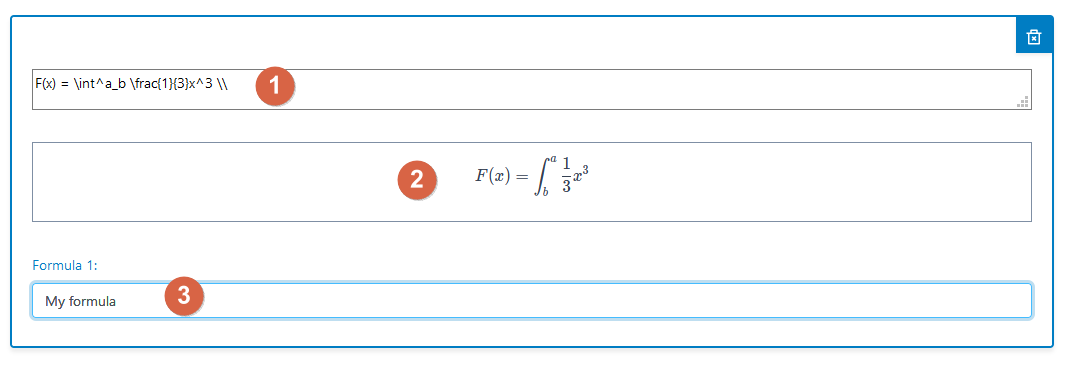
The formula editor consists of two areas:
- : Here you can enter the formula in LaTeX syntax
- : Here the formula is rendered
As with any other element, you can as well give the formula a title (see below).
In addition, you can copy to the clipboard the source code of an existing formula (see below).
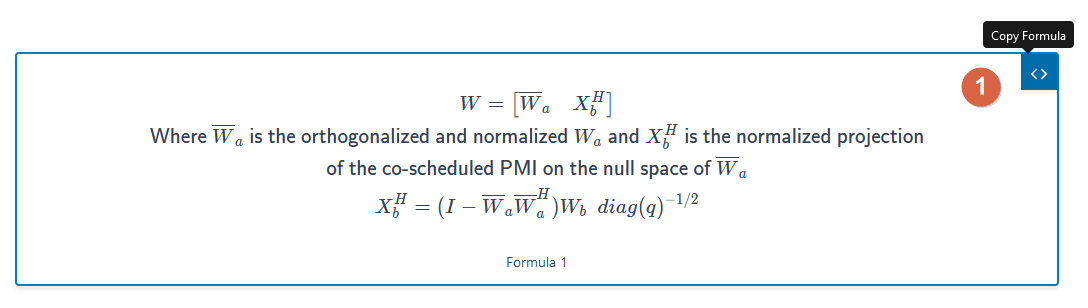
The LaTeX syntax from the example above is:
\begin{gathered}
W=\begin{bmatrix}\overline{W}_a & X_b^H \end{bmatrix}\\
\textsf{Where $\overline{W}_a$ is the orthogonalized and normalized $W_a$ and $X_b^H$ is the normalized projection} \\
\textsf {of the co-scheduled PMI on the null space of $\overline{W}_a$} \\
X_b^H = (I-\overline{W}_a\overline{W}_a^H)W_b~~diag(q)^{-1/2}
\end{gathered}
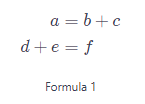
The character ‘&’ can be used to align a multi-line formula. The example below shows the LaTeX syntax to align the equal-sign
\begin{aligned}
 a&=b+c \\
 d+e&=f
\end{aligned}
Tip
You can find a ‘LaTeX formula cheat sheet’ at https://katex.org/docs/supported.html#layout (ordered by topic) or at https://katex.org/docs/support_table.htmlSelecting (ordered alphabetically).
Note for LaTeX experts: The formula is rendered in the equation* environment.
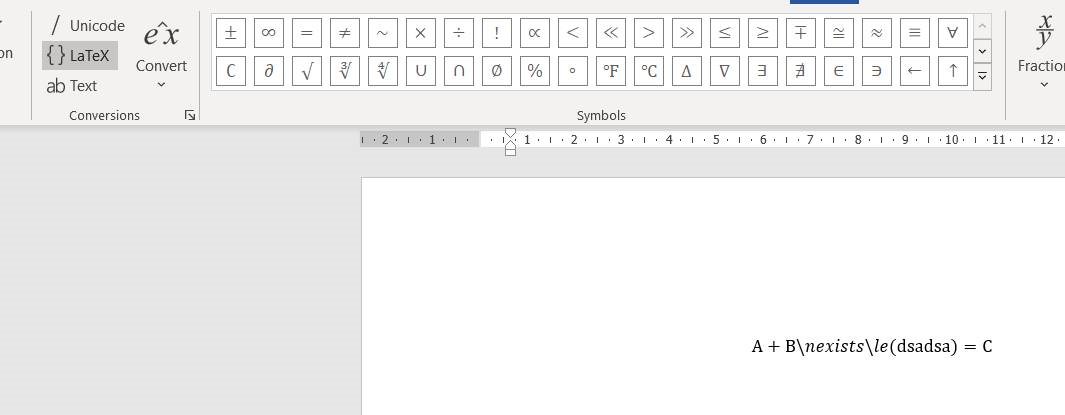
Convert a WORD Formula
The formula format in NWM is LaTeX.
In the latest version of Word (Word 365) there is a way to convert formulas to LaTex:
select the formula
then in the right-hand pulldown menu attached to the formula, select ‘Linear’ and make sure that LaTex is shown on the top toolbar in the Conversions section
you can copy this LaTex code into an NWM formula (insert an empty formula into the NWM document first) and it should work.
however, WORD may not always produce the correct LaTex format
Repairing your document
In some rare cases it can happen that something goes wrong with your document. This clause lists possible issues and their solutions.
Corrupted paragraphs
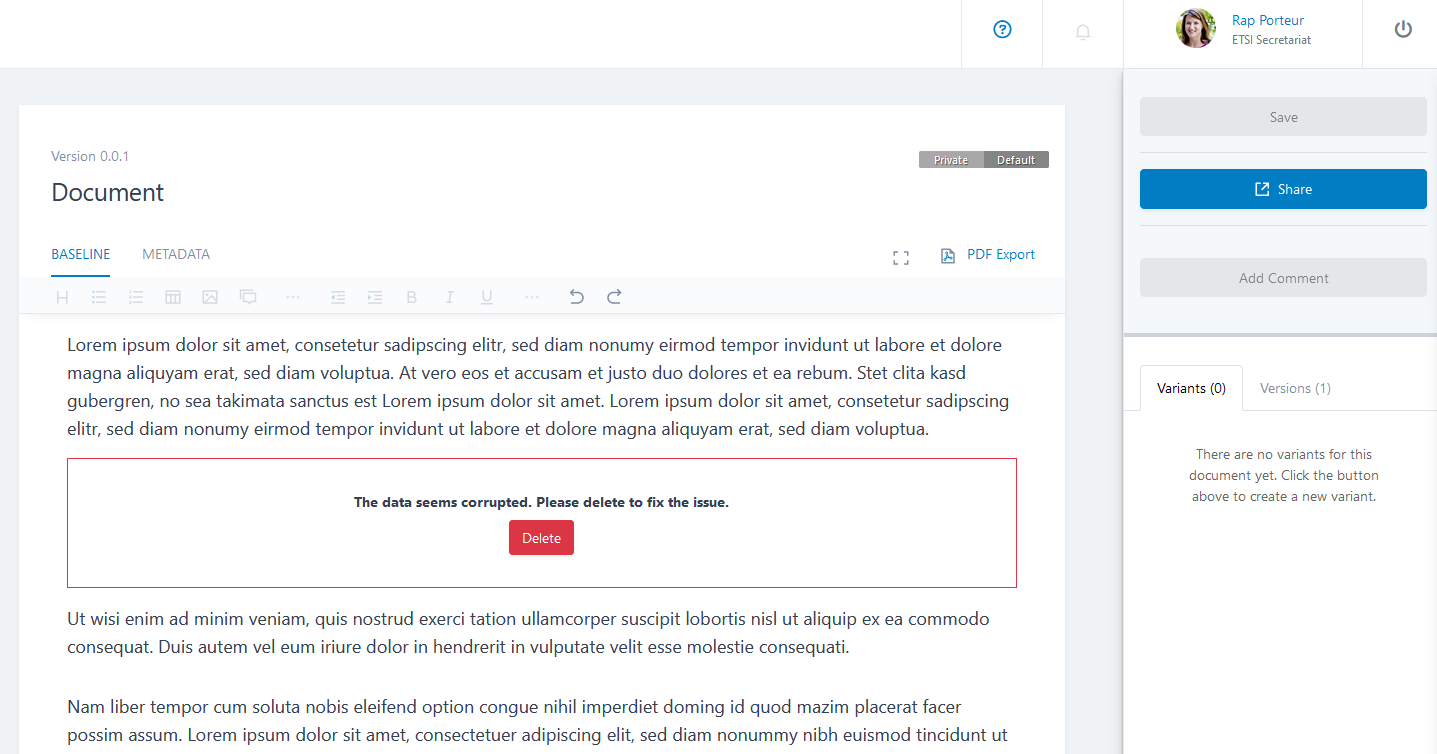
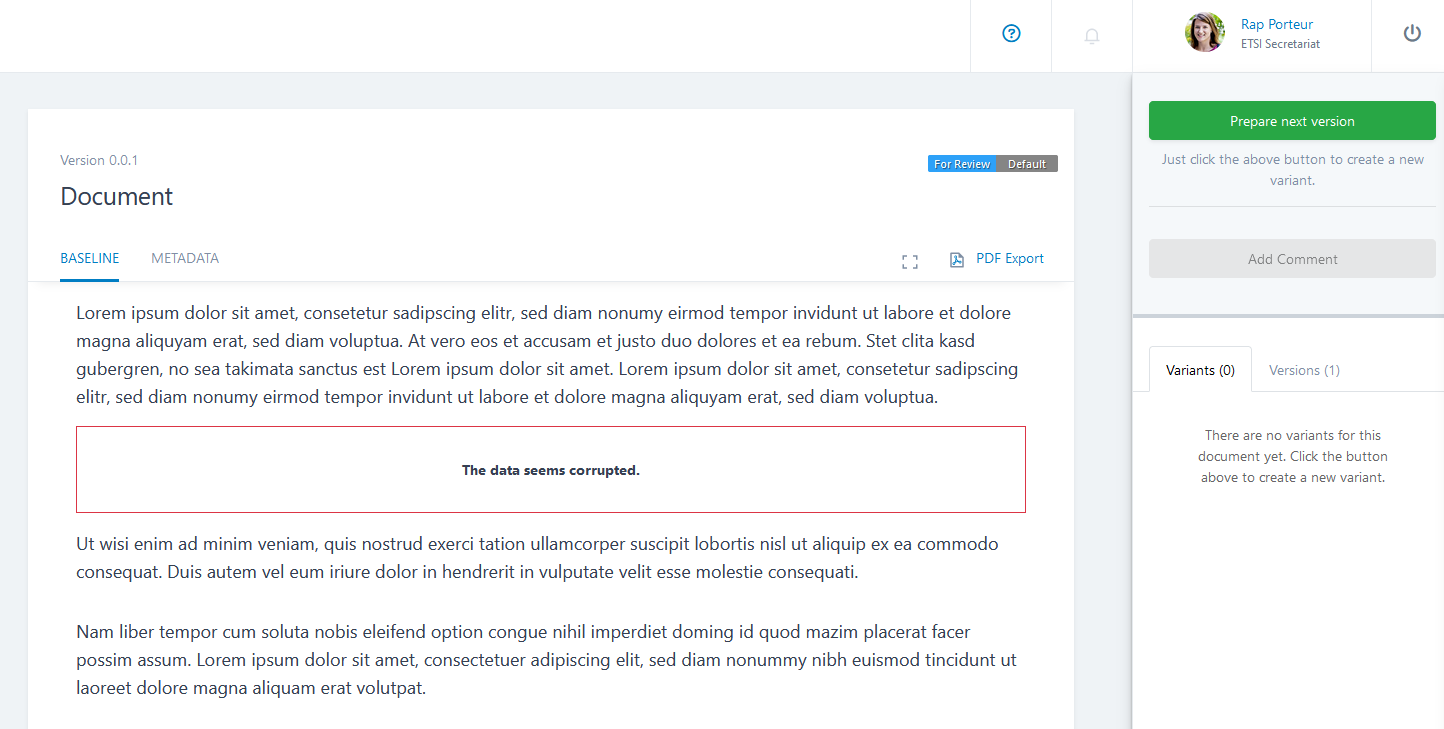
When the document contains one or more corrupted paragraphs (aka ‘grey blocks’), it cannot be printed anymore, and you have lost some data.
Corrupted paragraphs are detected, and error blocks are displayed at the paragraph’s location (see screenshot below).
To repair the document yourself, follow the steps below:
Examine the paragraphs before and after the error block, and determine which data was lost.
Delete the error block by clicking on Delete.
Insert a new paragraph and re-type the text that was lost.
When the document is shared, i.e. in read-only mode (see screenshot below), you first need to prepare a new version of it or create a new variant and then you can delete the corrupted paragraph.
Backend Recovery Service
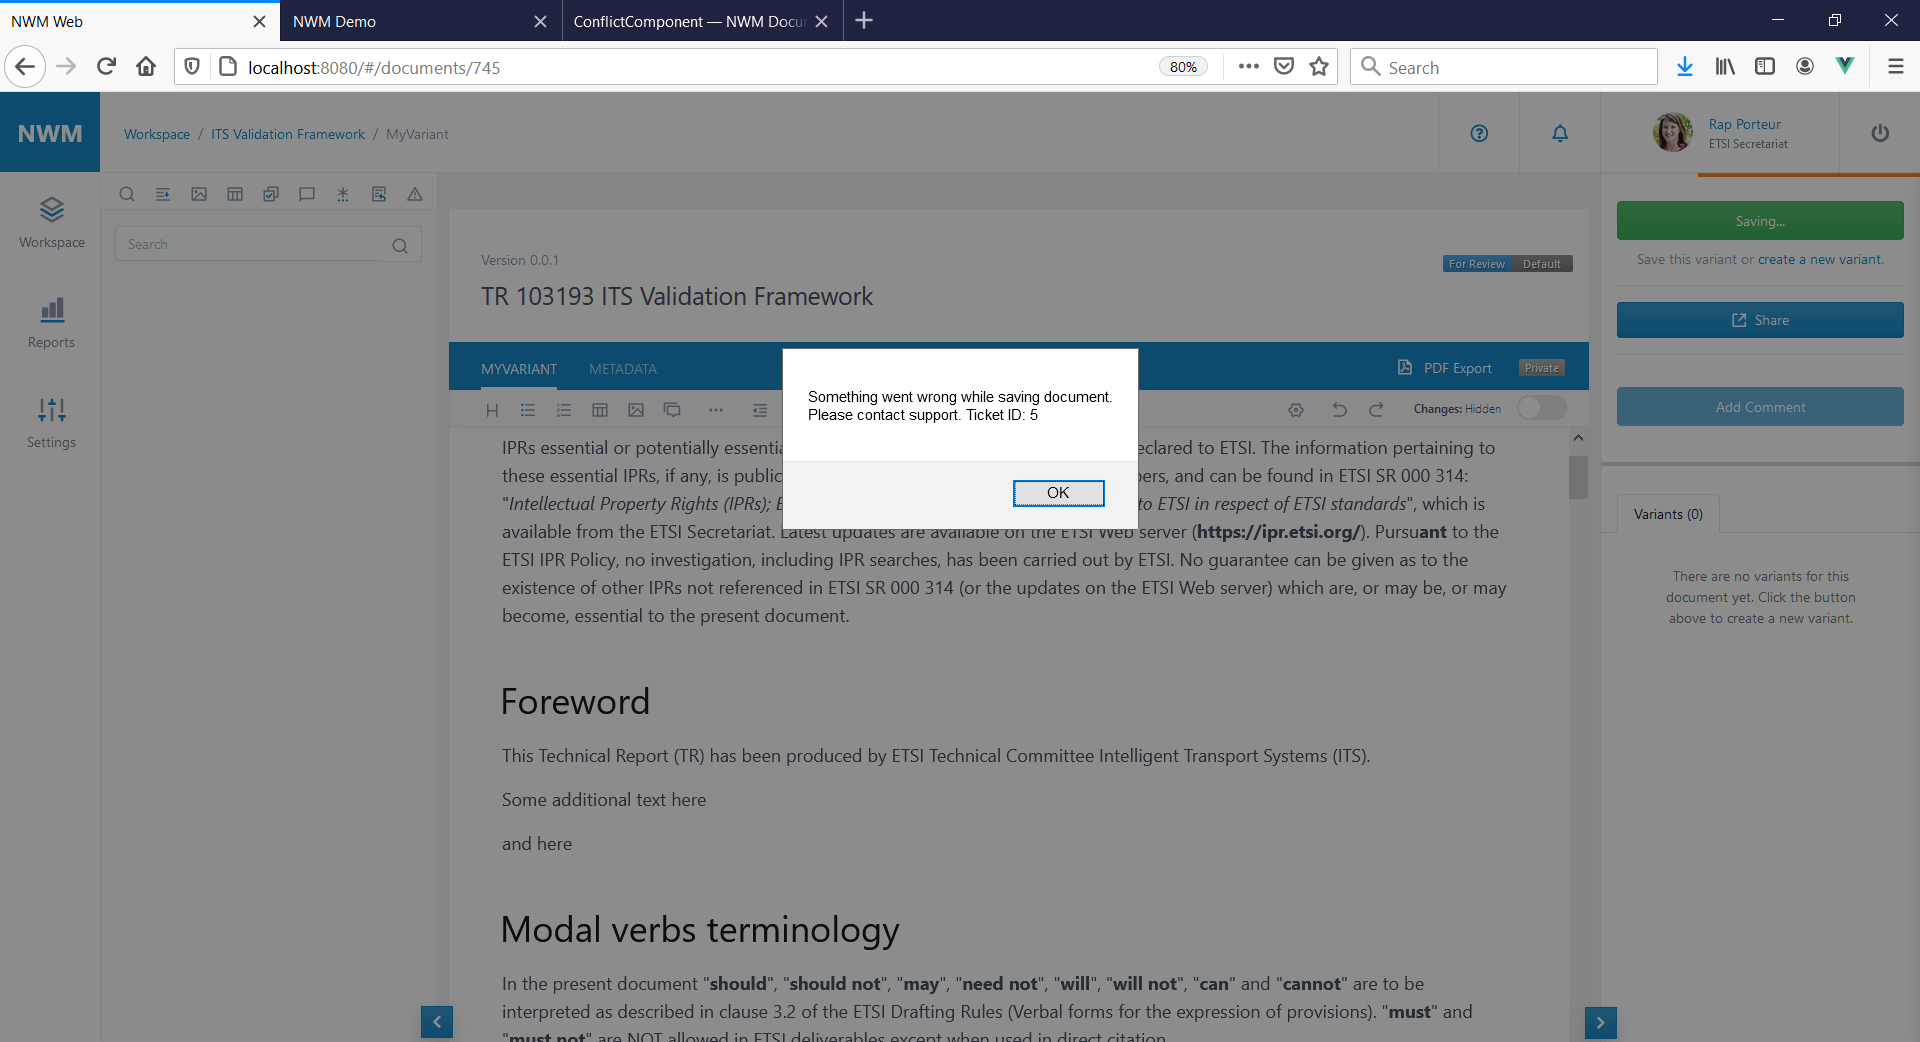
When you see a window in which a ticket number is shown (see image below), please send an email to the NWM support team (address is behind the Help icon on top of the document) containing:
# the ticket number # the url to your document
The NWM team may be able to debug the error and repair your document.
Templates
You can simplify the creation of a document by cloning an existing document:
Go to your workspace.
Click the ellipse button of the document you want to clone.
Select the point ‘Use as Template for new document’ in the menu.
A input modal opens in which you provide the title of the cloned document and its context.
The newly created document will be placed as the first entry of your workspace list.
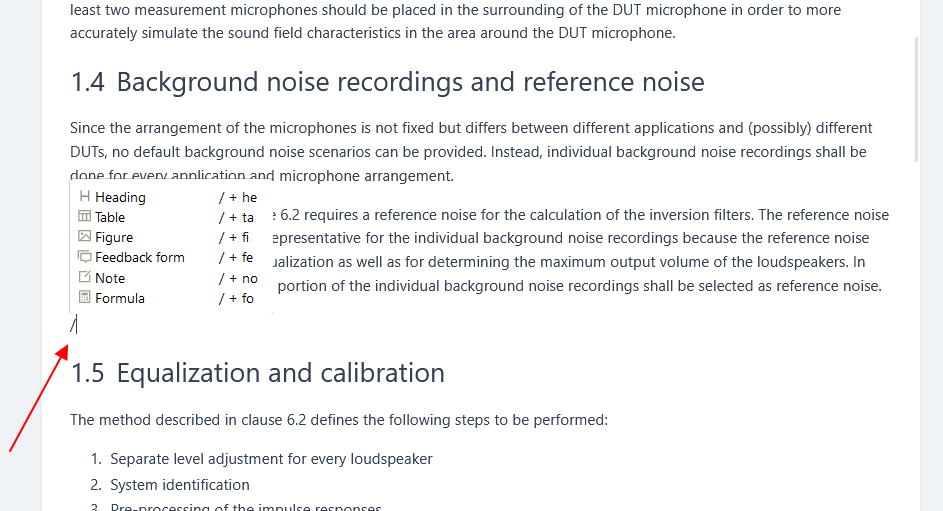
Insert elements via the slash command
The NWM editor supports slash commands, providing a quick and easy way to insert elements using your keyboard. To trigger a list of available slash commands, type / at the beginning of an empty line or inside a paragraph.